
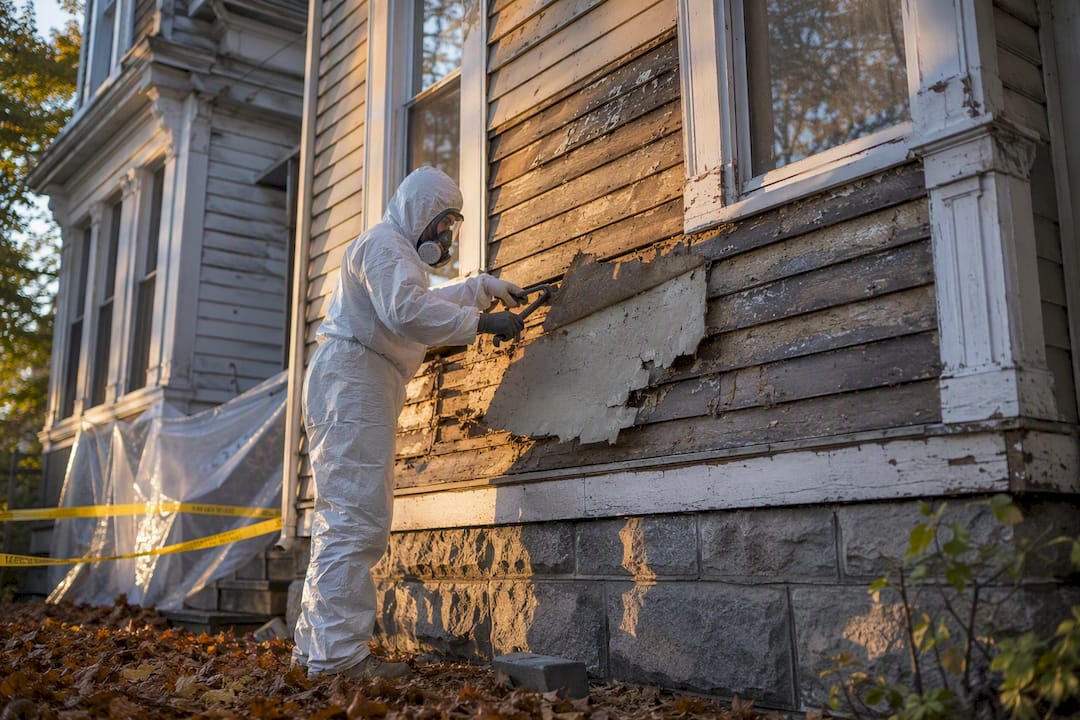
In most cases, you should not remove asbestos siding yourself. Health Canada and CCOHS both advise hiring a qualified professional to test and, where needed, remove asbestos-containing siding, and provincial rules like Ontario’s O. Reg. 278/05 back that up with legal training and containment requirements. Intact siding in good condition is often lower risk left alone, but the moment it’s cracking, being drilled, or scheduled for demolition, that changes.
If you suspect your siding contains asbestos, take three steps right now:
- Stop cutting, sanding, or pressure washing it immediately.
- Keep kids, pets, and anyone doing yard work away from the area.
- Call a testing professional or licensed abatement contractor before touching it again.
Pro Tip: Never sweep or vacuum debris from suspected asbestos siding with a regular shop vac. Regular vacuums exhaust fine fibres straight back into the air.
Table of Contents
- Quick decision checklist: test, leave, encapsulate, or call a pro?
- How do you get asbestos siding tested?
- When does the law require a professional abatement contractor?
- What happens on-site during a professional siding abatement?
- What PPE and containment should you actually see on site?
- How does asbestos siding waste have to be packaged and disposed of?
- What does asbestos siding removal cost, and what drives the price?
- How should you prepare, and what’s the realistic timeline?
- What does HMJ Contracting actually do on an asbestos siding job?
- Why professional abatement beats DIY removal, in one sentence
- Where to verify this information and go deeper
- What most asbestos guides get wrong
- Ready to test or remove asbestos siding? Here’s your next step
- Sources
Quick decision checklist: test, leave, encapsulate, or call a pro?
Homes built or clad before 1990 are the ones to watch, since asbestos cement siding (often called “transite”) was common well into the 1980s in many parts of Canada. Age alone tells you the probability, though. It doesn’t confirm anything, and you genuinely cannot tell asbestos content by looking at a wall, since CCOHS confirms only accredited lab testing does that reliably.
Run through this quickly:
- Check the age. Pre-1990 construction or renovation records raise the odds significantly.
- Look for damage. Crumbling edges, water staining, or visible fibre bloom mean higher urgency, not lower.
- Check your renovation plans. Any project involving cutting, drilling, or sanding the siding pushes this from “monitor” to “test now.”
- Isolate the area if you see any of the above, and hold off on demolition or exterior work.
Pro Tip: If you’re mid-renovation and just uncovered old siding you didn’t expect, stop that specific task, not the whole project. How asbestos findings reshape renovation timelines is worth reading before you make scheduling decisions.
How do you get asbestos siding tested?
Homeowners shouldn’t collect their own samples. Breaking off a chip to send to a lab is exactly the kind of disturbance that releases fibres, and it defeats the purpose of testing safely in the first place. A qualified inspector uses wetting agents and controlled sampling tools to extract a small piece without spreading dust, then bags and labels it for transport.
A proper laboratory bulk-sample report should tell you:
- The specific asbestos type present (chrysotile is the most common in cement siding).
- The percentage of asbestos by weight in the material.
- Whether the material is friable (crumbles by hand) or non-friable (bound tightly, lower immediate risk).
- Recommended handling: leave in place, encapsulate, or remove.
Turnaround for lab results is usually a matter of days, not weeks, and the testing itself is a small fraction of what full abatement costs. Skipping it to save that expense is the single most common mistake homeowners make, because it means every downstream decision, contractor scope, disposal plan, budget, gets built on a guess instead of a confirmed reading. Health Canada notes that undisturbed, intact material in good condition carries lower risk, which is exactly why the lab result (not a visual guess) should drive whether you leave siding alone or move to removal.
If you’re noticing warning signs already, common indicators worth checking before you renovate can help you decide how urgently to book that test.
When does the law require a professional abatement contractor?
Provincial regulation doesn’t leave this to judgment calls once certain thresholds are crossed. Ontario’s O. Reg. 278/05, used here as a representative example of how provinces structure these rules, classifies asbestos work by risk level and sets training requirements accordingly. Manual removal of intact, non-friable siding might fall under a lower-risk operation class, but anything involving power tools, extensive demolition, or friable material typically triggers stricter licensing, containment, and notification rules. CCOHS guidance reinforces that workers on many abatement jobs need approved training before they’re legally allowed on site.
A full-scope abatement contractor should deliver more than removal. Expect:
- A written work plan outlining containment method and removal technique before work starts.
- Permit filing and any required notification to the local authority.
- Site containment, removal, and packaging performed by trained workers.
- Post-job documentation, including clearance air testing.
When you’re vetting contractors, ask for proof, not promises. Certifications and worker training records should be available on request. Liability and workers’ compensation insurance should be current and confirmable. A written work plan, not a verbal estimate, should spell out containment and disposal steps. And the quote should be itemized, breaking out testing, containment, removal, and disposal, rather than one lump number.
Pro Tip: A contractor who can’t produce a written work plan on request usually can’t produce clearance documentation either. Treat that as a hard pass, not a negotiating point.
What happens on-site during a professional siding abatement?
The sequence matters more than most homeowners expect, and it’s worth knowing what you should see if you’re standing in your own driveway watching it happen.
- Site setup. Crews establish an exclusion zone around the work area, post warning signage, and stage tools, water sources, and waste containers before touching the siding.
- Wetting. Panels are saturated with an amended water solution to suppress dust before any removal begins. This step happens repeatedly through the job, not just once at the start.
- Manual detachment. For intact, non-friable panels, crews typically pry and lower sections by hand rather than pulling or snapping them.
- Glove bag use for small sections. Where a panel needs cutting or a fastener needs removal, workers may use a sealed glove bag system that lets hands work inside a contained sleeve without exposing the surrounding air.
- Power tools only under strict controls. Cutting, grinding, or drilling siding elevates the job to a higher-risk operation class requiring negative-pressure containment and more rigorous respiratory protection. Reputable crews avoid power tools on asbestos siding whenever manual removal is viable.
- Immediate packaging. Removed panels go straight into labelled waste bags or wrapping at the point of removal, not later, and not staged loose anywhere on the property.
That last point is worth watching closely. A crew that removes panels and stacks them against a fence “to bag later” is skipping a step that exists specifically to prevent fibre release between removal and transport.
What PPE and containment should you actually see on site?
The gear a crew wears tells you a lot about whether they’re taking the job seriously. At minimum, workers should be in a P100-rated respirator (the highest particulate filtration rating available for this kind of work), a disposable coverall suit, gloves, and boot covers, all replaced or decontaminated between work sessions rather than reused across the day.
Engineering controls back up the PPE:
- Negative-pressure HEPA units pull air out of the containment area through filtration, so airborne fibres can’t drift into the rest of the property.
- Glove bags contain small cutting or detachment tasks inside a sealed sleeve.
- Decontamination units give workers a controlled path to remove suits and wash up before leaving the containment zone.
- HEPA vacuums handle dust and debris cleanup, since standard vacuums simply redistribute fine fibres through their exhaust.
Cleanup itself follows a specific order: wet wiping surfaces first, HEPA vacuuming second, and only then does air monitoring confirm the area is clear. HMJ Contracting’s abatement process treats that final clearance test, not the visual cleanup, as the actual proof the space is safe to re-enter. A clean-looking site and a cleared site are two different things, and only lab-verified air sampling tells you which one you’re standing in.
How does asbestos siding waste have to be packaged and disposed of?
This is the stage where a lot of otherwise careful jobs fall apart, usually because packaging and landfill logistics get treated as an afterthought.
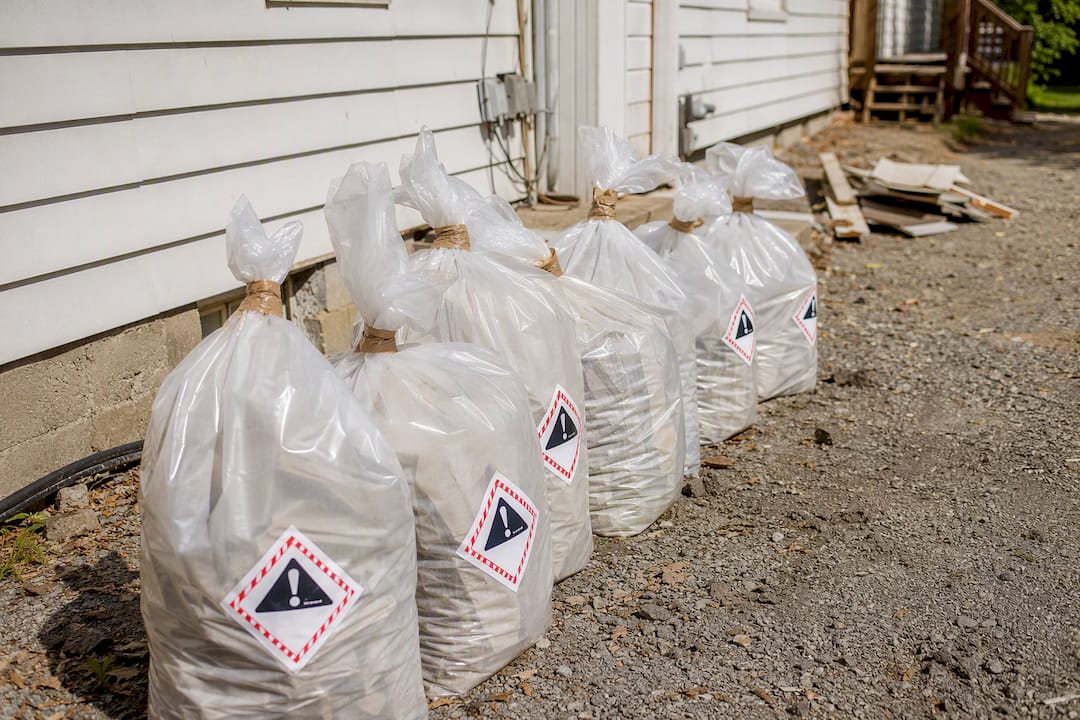
Standard packaging requires double-bagging in 6-mil polyethylene, or an equivalent sealed wrap, with every seam taped and every bag sealed tight enough to survive handling and transport without tearing. Calgary’s municipal disposal guidance is a good example of how specific these packaging standards get, and most Canadian municipalities follow similar principles.
Labelling matters just as much as the bagging. Bags need clear asbestos warning labels, and most authorized facilities require pre-notification before you show up, since asbestos waste typically can’t just be dropped off during a random visit like household junk.
- Double-bag or wrap in 6-mil polyethylene with taped, sealed seams.
- Label every bag with asbestos warning markings before transport.
- Pre-notify the receiving landfill and schedule an approved drop-off window.
- Keep disposal receipts and any manifest as your proof of compliant handling.
Improperly packaged loads get turned away at the gate more often than homeowners expect, which means a rejected load isn’t just an inconvenience. It’s asbestos waste sitting back in your truck or driveway until it’s repackaged correctly.
Pro Tip: Ask your contractor for the landfill receipt and manifest number as a standard part of your final paperwork, not something you have to request after the fact.
What does asbestos siding removal cost, and what drives the price?
Costs swing widely based on a handful of factors, and understanding them helps you read a quote instead of just reacting to the bottom-line number.
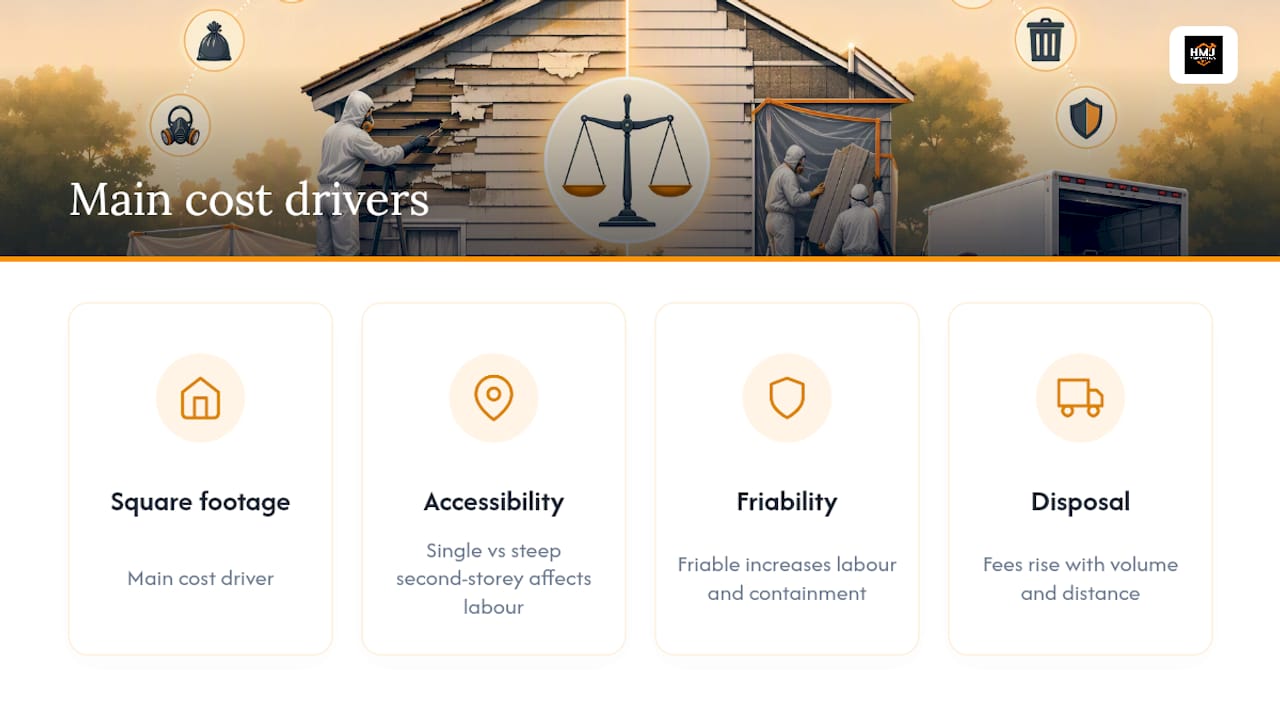
The main drivers are square footage, how accessible the siding is (a single-storey bungalow versus a steep second-storey gable changes labour time considerably), whether the material tests as friable or non-friable, and disposal fees, which climb with volume and distance to an authorized facility. Testing and post-job clearance sampling add a smaller but consistent line item regardless of job size.
Roughly speaking, a small patch repair sits at the low end of the range, a single side of a house lands in the middle, and full re-cladding of an entire home is the most expensive scenario because it combines maximum square footage with full containment setup and teardown. HMJ Contracting’s Ottawa-area pricing guide breaks these bands down with real local examples if you want specific figures for comparison.
When you’re reading an itemized quote, look for testing, containment setup, removal labour, disposal fees, and clearance testing listed as separate lines. A quote that bundles everything into one number, or skips disposal and clearance testing entirely, is either underestimating scope or planning to add those costs later as surprises. Either way, it’s a red flag worth asking about directly before you sign anything.
How should you prepare, and what’s the realistic timeline?
Before the crew arrives, clear furniture, planters, or vehicles away from the exterior work zone, and secure any window coverings or screens near the containment area. If bedrooms or living spaces sit close to the exterior wall being worked on, some homeowners choose to relocate temporarily for the day, particularly with young kids or anyone with respiratory sensitivities.
A typical project moves through these stages:
- Assessment and sampling: a few days to schedule and complete.
- Lab results: usually returned within about a week.
- Booking the abatement crew: timing depends on contractor availability, often one to three weeks out.
- Removal and containment work: one to a few days depending on the size of the job.
- Clearance air testing: results typically follow within a day or two of work completion.
Once the job wraps, collect the clearance testing report, disposal receipts, and the landfill manifest from your contractor. Keep these with your home records. They’re your proof of compliant handling if you ever sell the property or face a question about past renovation work. For broader tips on minimizing disruption during the process, strategies for reducing renovation disruption covers the logistics side in more depth.
What does HMJ Contracting actually do on an asbestos siding job?
A siding abatement job at HMJ Contracting starts with coordinating lab testing, then moves into a written work plan, permit filing where required, and full containment before a single panel comes off. Debris is packaged and hauled the same day it’s removed, and the job doesn’t close out until post-work air testing confirms the space is clear.
If you’re vetting any contractor, including HMJ, ask to see these before work begins:
- An itemized quote separating testing, containment, removal, and disposal.
- A written work plan describing containment method and removal sequence.
- Pre- and post-work air testing reports.
- Landfill receipts and manifest documentation after disposal.
Pro Tip: Ask to see a sample clearance report from a past job before you sign anything. A contractor with nothing to show you has likely skipped that step before, too.
That documentation isn’t paperwork for its own sake. It’s what lets you, or a future buyer’s home inspector, confirm the work was done to standard rather than taking someone’s word for it.
Why professional abatement beats DIY removal, in one sentence
Professional asbestos siding removal costs more upfront than DIY, but it’s the only approach that combines confirmed lab testing, legal compliance, and documented clearance proof that protects your health and your home’s resale value.
| Point | Details |
|---|---|
| Get lab testing first | Never guess based on appearance; only accredited lab results confirm asbestos type and percentage. |
| Know your legal triggers | Power tools, friable material, and large-scale removal usually require licensed, trained workers under provincial rules. |
| Verify contractor documentation | Ask for a written work plan, itemized quote, and pre/post clearance air testing reports. |
| Package and dispose correctly | Waste needs 6-mil double-bagging, clear labelling, and pre-notified landfill drop-off to avoid rejection. |
| Choose a documented process | HMJ Contracting coordinates testing, permits, containment, and clearance testing as one accountable workflow. |
Where to verify this information and go deeper
For anything involving your own health or a legal obligation, go to the source directly rather than relying on secondhand summaries.
- Health Canada’s asbestos health guidance for federal risk information.
- Ontario Regulation 278/05 as an example of provincial training and containment rules.
- CCOHS asbestos in the home guidance for testing and household risk basics.
- Asbestos removal cost in Ottawa: 2026 price guide for local pricing examples.
- How asbestos affects renovation plans: a 2026 guide for project planning impacts.
What most asbestos guides get wrong
Most articles on this topic treat testing and removal as a single decision point: find asbestos, hire someone, done. That’s not wrong, exactly, but it undersells where things actually go sideways. In my read of how these projects fail, it’s almost never the removal technique itself. Crews generally know how to wet down siding and bag it properly. The failures cluster at the edges: skipped lab testing because a homeowner “was pretty sure” about the age of the siding, disposal loads rejected at the landfill because nobody pre-notified the facility, and clearance testing treated as optional paperwork instead of the actual proof of safety.
If you take one thing from this guide, make it this: demand the clearance report before you set foot back in a room near that work. Not the invoice. Not a verbal “all good.” The air test. Everything else, containment, PPE, disposal receipts, matters because it leads to that one document. Homeowners who focus their scrutiny there, rather than on getting the cheapest quote, end up with the safest outcome and the paper trail to prove it later.
— Jason
Ready to test or remove asbestos siding? Here’s your next step
If you’ve read this far, you already know DIY removal isn’t the move here, and now you’re weighing which contractor actually delivers on paperwork instead of just promises. Hmjcontracting is the option built specifically around that gap: every siding abatement job comes with a written work plan, permit handling, and pre- and post-work clearance air testing documented in writing, not just described verbally on a walkthrough.

That matters most for Ottawa-area homeowners juggling renovation timelines, since Hmjcontracting also handles the debris hauling and disposal coordination that trips up so many DIY-adjacent attempts, meaning you’re not left chasing landfill drop-off windows on your own. If your siding removal is part of a bigger renovation, the design centre is worth a look for planning what goes back up once the old cladding comes down. Start with a free itemized abatement quote and get a written work plan before any panel gets touched.
This article is general information, not a substitute for advice from a qualified doctor. Consult a qualified healthcare professional about your own circumstances before acting on anything here.