
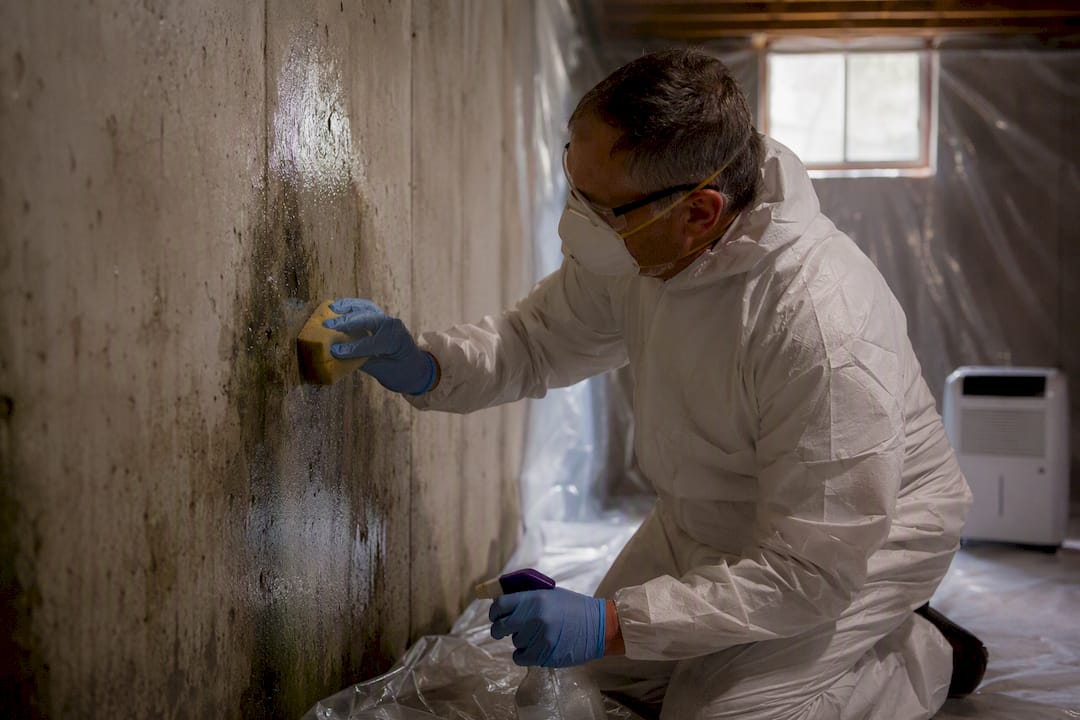
If you’re staring at a patch of fuzzy black or green growth on your basement wall right now, here’s the short answer: small patches under about one square metre can often be cleaned by a homeowner, but the very first move isn’t scrubbing. It’s finding and stopping the moisture feeding it. Health Canada is clear that fixing the water problem comes before cleanup, because mould regrows within days if the source stays wet.
Some situations aren’t DIY territory. If the affected area is bigger than a few square metres, if the water came from a sewage backup, if the smell has lingered for weeks without visible growth, or if someone in your household has asthma or a compromised immune system, stop and call a professional certified through the IICRC (Institute of Inspection, Cleaning and Restoration Certification). The CDC backs the same line: bigger jobs and contaminated water need trained crews, not a bucket and a sponge.
Before you touch anything, take these steps:
- Keep kids, pets, and anyone with respiratory issues out of the area.
- Open a window or run an exhaust fan, but don’t blast a furnace fan that spreads spores through the house.
- Avoid dry-brushing or vacuuming mould with a regular vacuum. It launches spores into the air.
- Photograph the damage before cleanup starts, for your records or a future contractor.
- Shut off standing water sources if it’s safe to do so.
Key Takeaways
Basement mold remediation succeeds when moisture control comes first, size and water source determine whether DIY is safe, and porous materials get removed rather than sprayed.
| Point | Details |
|---|---|
| Fix moisture before cleaning | Mould regrows within days if the water source stays active, so repair leaks and grading first. |
| Use the size threshold | Areas under one square metre are typically DIY-friendly; over a few square metres calls for a professional. |
| Skip routine air testing | Visual inspection and moisture readings guide remediation decisions better than lab sampling. |
| Discard soaked porous materials | Carpet, insulation, and wet drywall usually can’t be cleaned and should be bagged and discarded. |
| Call HMJ Contracting for larger jobs | HMJ Contracting offers certified containment, abatement, and documented post-remediation verification for Ottawa-area basements. |
Table of Contents
- How to identify visible and hidden mould in a basement
- When is DIY reasonable and when should you hire a professional?
- Step-by-step DIY cleanup for hard surfaces
- How to set up containment for bigger jobs
- Fixing the moisture source and hitting drying targets
- How and when to hire a remediation contractor
- What does basement mold remediation cost and how long does it take?
- What certified abatement contractors do differently
- What I’ve learned about why basement mould keeps coming back
- Ready to bring in a certified team for basement mold remediation?
- Frequently asked questions about basement mold remediation
- Sources
How to identify visible and hidden mould in a basement
Basement mould shows up in patterns most people miss until they know what to look for. Black, green, or grey fuzzy patches usually mean active growth. A slimy, dark film often points to prolonged dampness rather than a quick splash. Concrete walls, the cove joint where the floor meets the foundation wall, window wells, and the underside of flooring are the classic hiding spots, because that’s where condensation and groundwater seepage linger longest.
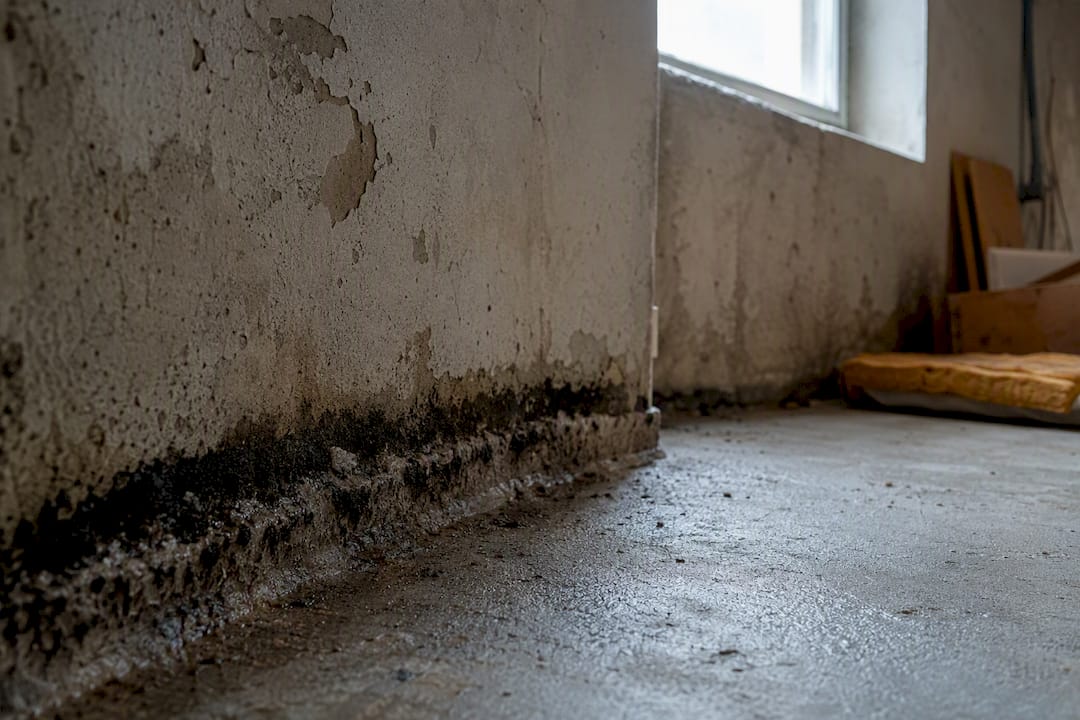
Smell matters as much as sight. A persistent musty odour with no visible growth almost always means mould is growing somewhere you can’t see, behind drywall, under carpet, or inside a wall cavity. Don’t ignore it just because you can’t find the source on day one.
Watch for these companion clues, since mould rarely shows up alone:
- Condensation beading on pipes, windows, or concrete walls
- White, chalky efflorescence on foundation walls (a sign of moisture moving through concrete)
- Water stains or rings on drywall, baseboards, or ceiling tiles
- Peeling paint or bubbling drywall paper
- Warped baseboards, swollen wood trim, or buckled flooring
Run a quick hotspot sweep: check behind stored boxes, under area rugs, along exterior-facing walls, around floor drains, and behind furniture pushed against cold walls.
Pro Tip: If you find a musty smell plus visible growth plus a damp material all in the same area, treat it as a priority. That combination usually means the problem is bigger than what’s on the surface.
When is DIY reasonable and when should you hire a professional?
Size and water source drive this decision more than anything else. A patch smaller than roughly one square metre, caused by ordinary condensation or a minor leak, is typically manageable with basic PPE and household cleaners. A medium area between roughly one and a few square metres still might be DIY-friendly for a confident homeowner, but it demands stricter containment. Anything larger than a few square metres crosses into professional territory, according to guidance from Health Canada.
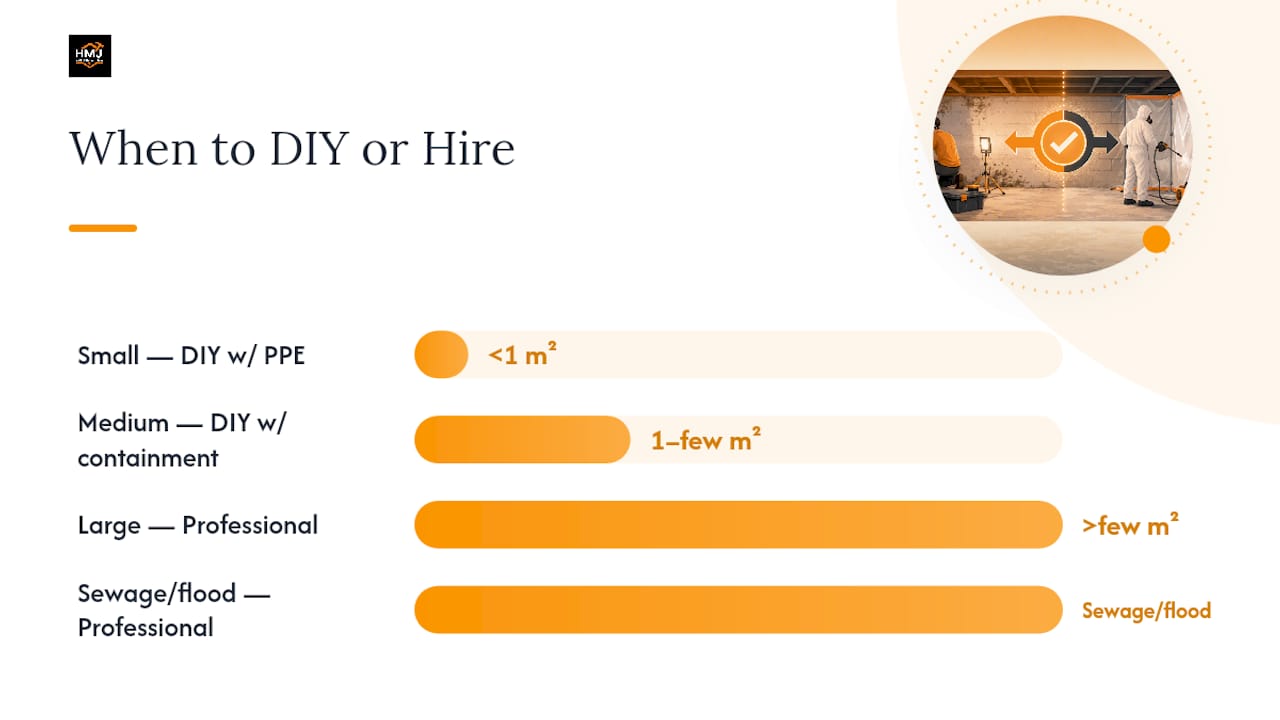
Water source changes the math too. Clean condensation is lower risk than a sewage backup or contaminated flood water, which can carry bacteria alongside mould spores and always warrants a professional response.
Call a pro immediately if any of these apply:
- Someone in the home is immunocompromised, elderly, an infant, or has asthma
- The mould keeps returning after you’ve cleaned it
- You suspect hidden growth behind walls or under flooring
- The water source was sewage, flooding, or long-term hidden leaks
Testing is rarely the right next step. Guidance for indoor air quality professionals states that routine air sampling has limited value for deciding how to remediate. Visual inspection and moisture readings tell you far more than a lab report, and they cost nothing.
Step-by-step DIY cleanup for hard surfaces
Small to medium patches on concrete, tile, or painted drywall can be cleaned safely, provided you contain the area and gear up properly first. This is the answer. Here’s how to execute it.
PPE checklist before you start:
- N95 respirator or better, fitted snugly against your face
- Rubber or nitrile gloves that extend past the wrist
- Goggles without ventilation holes (regular safety glasses let spores in)
- Long sleeves and pants you can wash immediately after
- Rubber boots if you’re working near standing water
Cleaning sequence:
- Close doors to the rest of the basement and, if possible, tape plastic sheeting over doorways.
- Turn off forced-air HVAC systems serving that room so spores don’t travel through the ducts.
- Mist the mouldy surface lightly with water before wiping. This keeps spores from becoming airborne.
- Scrub with a detergent solution or a diluted bleach mix, one cup of household bleach per gallon of water, following the ratio the CDC recommends for hard, non-porous surfaces.
- Rinse with clean water and dry the surface completely with fans or a dehumidifier.
- Bag cleaning rags, sponges, and disposable PPE in sealed plastic and discard them.
Never mix bleach with ammonia or other cleaners. The combination produces toxic fumes. Also skip dry-scraping mould off a surface. It’s the fastest way to send a cloud of spores into the room you’re trying to clean.
Porous materials play by different rules. Carpet, insulation, ceiling tiles, and drywall that stayed wet for more than 48 hours usually can’t be fully cleaned. Public health guidance recommends discarding heavily contaminated porous items rather than trying to salvage them, since spores embed deep into the material’s fibres. Cut out affected drywall generously, at least 30 centimetres beyond the visible stain, bag it before carrying it through the house, and seal the bag before it goes in the bin.
Once you’ve finished, check your work. The surface should look clean with no residual staining, feel completely dry to the touch, and stay that way for at least a few days. If the same spot darkens again within a week or two, the moisture source wasn’t fixed, and that’s your signal to dig deeper or call in help.
How to set up containment for bigger jobs
Once you’re past small patches, containment stops becoming optional. Plastic sheeting taped floor to ceiling, zippered entry doors, and sealed seams around vents and outlets keep spores from migrating into the rest of the house while you work. Professionals also run negative air machines that pull air out of the contained zone and exhaust it outside, so airflow moves toward the mould, not away from it.
Equipment that actually earns its keep on a medium or large job:
- HEPA-filtered vacuums, which trap spores that a regular vacuum would just recirculate
- Negative air machines, to maintain lower pressure inside the containment zone
- Commercial dehumidifiers, to pull moisture out of the air while cleanup happens
- Duct tape and poly sheeting, for sealing seams and entry points
A confident homeowner tackling a medium job can rig basic containment: taped plastic over doorways, a box fan exhausting through a cracked window, and sealed floor vents. But rigging a negative air setup without proper venting can pressurize a room the wrong way and pull spores into your living space instead of out of it. If a job needs true negative air pressure, that’s the point where professional containment makes more sense than improvising.
Fixing the moisture source and hitting drying targets
Cleaning mould without fixing the water problem is a waste of a Saturday. Mould can establish itself on wet materials within 48 to 72 hours, so drying speed matters as much as the cleaning method itself.
Walk through these common basement moisture sources before you do anything else:
- Grading around the foundation that slopes toward the house instead of away
- Downspouts dumping water right next to the foundation wall
- A sump pump that’s undersized, unplugged, or missing a battery backup
- Slow plumbing leaks under sinks or behind laundry connections
- Condensation on cold pipes or concrete walls during humid months
The CDC recommends drying wet materials within 24 to 48 hours after any flooding event, and that window shrinks further in a humid basement. Run a dehumidifier continuously until a hygrometer reads between 30% and 50% relative humidity, which is the band Health Canada recommends for preventing regrowth. Insulate cold water pipes to stop condensation, extend downspouts well away from the foundation, and swap cardboard storage boxes for sealed plastic totes raised off the floor.
A $15 hygrometer from any hardware store tells you more about your regrowth risk than a lab test ever will.
How and when to hire a remediation contractor
Once you’ve decided a job is too big, contaminated, or persistent for DIY, the contractor you hire matters as much as the decision to hire one. Before signing anything, ask these questions:
- Are your technicians certified through the IICRC or an equivalent training standard?
- Can you provide a written, itemized scope of work with containment details?
- What’s your insurance coverage, and can I see proof?
- Do you have references from similar basement jobs?
- What does your post-remediation verification look like?
A legitimate remediation company follows a predictable sequence: inspection, containment setup, source repair coordination, removal of contaminated materials, HEPA vacuuming, drying, and moisture verification, then final cleaning. If a company skips straight to spraying chemicals without discussing containment or the moisture source, that’s a red flag, not a shortcut.
After the work wraps up, ask for proof it actually worked. A visual clearance check, moisture readings on the repaired surfaces, and a white-glove wipe test on nearby surfaces are all reasonable requests. Independent third-party inspection is worth the extra cost only on large jobs or insurance claims, not routine cleanups. For homeowners weighing this decision, our guide on choosing between DIY and professional remediation walks through the trade-offs in more detail.
What does basement mold remediation cost and how long does it take?
DIY material costs stay modest for small jobs: expect somewhere in the range of $50 to $150 for PPE, detergent or bleach, plastic sheeting, and possibly a rented HEPA vacuum or dehumidifier for a weekend.
Professional remediation scales with square footage and contamination severity. A small, contained job might run a few hundred dollars. Medium jobs involving containment and some material removal often land in the low thousands. Large-scale remediation with structural drying and rebuilds can climb well beyond that, particularly when drywall, insulation, or flooring needs replacing.
Timelines vary the same way:
- Small DIY jobs can often be completed in a single afternoon
- Medium professional jobs may take several days, including drying time
- Large jobs with material removal and rebuilds may take multiple weeks
Budget for rebuild costs upfront if porous materials are coming out. Replacing drywall or flooring often costs more than the remediation itself.
What certified abatement contractors do differently
Certified remediation crews follow a sequence built to prevent the mistakes DIYers most often make. Spraying bleach directly onto porous drywall, for instance, pushes moisture and spores deeper into the material instead of removing them, which is exactly why professionals cut out and discard contaminated porous materials rather than trying to disinfect them in place.
A properly run job includes:
- Initial inspection and moisture mapping before any work starts
- Sealed containment with negative air where the job size calls for it
- Removal of contaminated porous materials, bagged and disposed of properly
- HEPA vacuuming of all surfaces in the work zone
- Moisture verification before rebuild work begins
- A final visual inspection and cleaning pass
Ask for documentation at every stage: an itemized quote, a written work plan, waste disposal records, and a post-remediation report. Companies with IICRC-trained technicians and a track record of transparent, documented work, the kind HMJ Contracting has built across hundreds of Ottawa-area projects, treat that paperwork as standard practice, not an upsell.
What I’ve learned about why basement mould keeps coming back
The homeowners who call about mould a second time almost always skipped the moisture fix the first time around. They cleaned the visible patch, felt good about it, and never touched the leaking downspout or the undersized sump pump that caused it. Cleaning is the easy part. Diagnosing why the basement got wet in the first place is where most DIY efforts fall short.
A few patterns show up again and again:
- Homeowners treat mould as a cleaning problem instead of a moisture problem, then wonder why it returns within a season.
- Nobody checks humidity levels until after the growth shows up, when a $15 hygrometer would have flagged the risk months earlier.
- People push through DIY on jobs that clearly needed containment, and end up with spores in rooms that were never affected before.
Ready to bring in a certified team for basement mold remediation?
DIY handles a lot of small basement mould problems, but there’s a real ceiling to what a homeowner should tackle alone, especially once size, water source, or a family member’s health tips the risk scale. HMJ Contracting exists for exactly that gap: a certified, local alternative to guesswork, with an itemized quote instead of a vague estimate and a documented process from inspection through final verification.

HMJ’s remediation service covers full inspection, professional containment, certified abatement, and a written post-remediation report, the same documentation trail this guide recommends asking any contractor for. Ottawa-area homeowners dealing with older properties benefit most, since aging foundations and finished basements tend to hide moisture problems behind walls that a quick DIY check won’t catch.
If you’re ready for a second opinion, request a free estimate for mould remediation and have photos of the affected area, an approximate square footage, and any history of water intrusion ready. That gets you an accurate quote on the first call instead of a guess.
Frequently asked questions about basement mold remediation
Can I remove basement mould myself, or do I always need a professional? Small patches under 1 square metre on hard surfaces are usually safe to clean yourself with proper PPE, according to Health Canada. Anything larger, contaminated by sewage, or affecting a vulnerable household member needs a certified contractor.
How do I know if I have hidden mould behind my basement walls? A persistent musty smell with no visible growth is the strongest indicator. Check for water stains, warped baseboards, or peeling paint nearby, and consider cutting a small inspection hole if the smell won’t go away.
Should I get air quality testing before starting basement mold remediation? Usually not. Guidance for indoor air quality professionals states that air sampling adds limited value for most remediation decisions. Visual inspection and moisture measurements are more useful and cheaper.
What’s the difference between bleach and detergent for cleaning mould? Detergent works fine on most hard surfaces and is gentler on materials. The CDC’s diluted bleach ratio, one cup per gallon of water, is for situations needing disinfection, never on porous materials, and never mixed with ammonia.
How long does professional basement mold remediation take? Small jobs can wrap in a day. Medium jobs with containment and drying typically take 2 to 5 days. Large jobs involving material removal and rebuilds can stretch across several weeks.
This article is general information, not a substitute for advice from a qualified doctor. Consult a qualified healthcare professional about your own circumstances before acting on anything here.
Sources
Routine air testing rarely changes what you should do next. Save that cost for insurance disputes or cases where a professional recommends it specifically.