
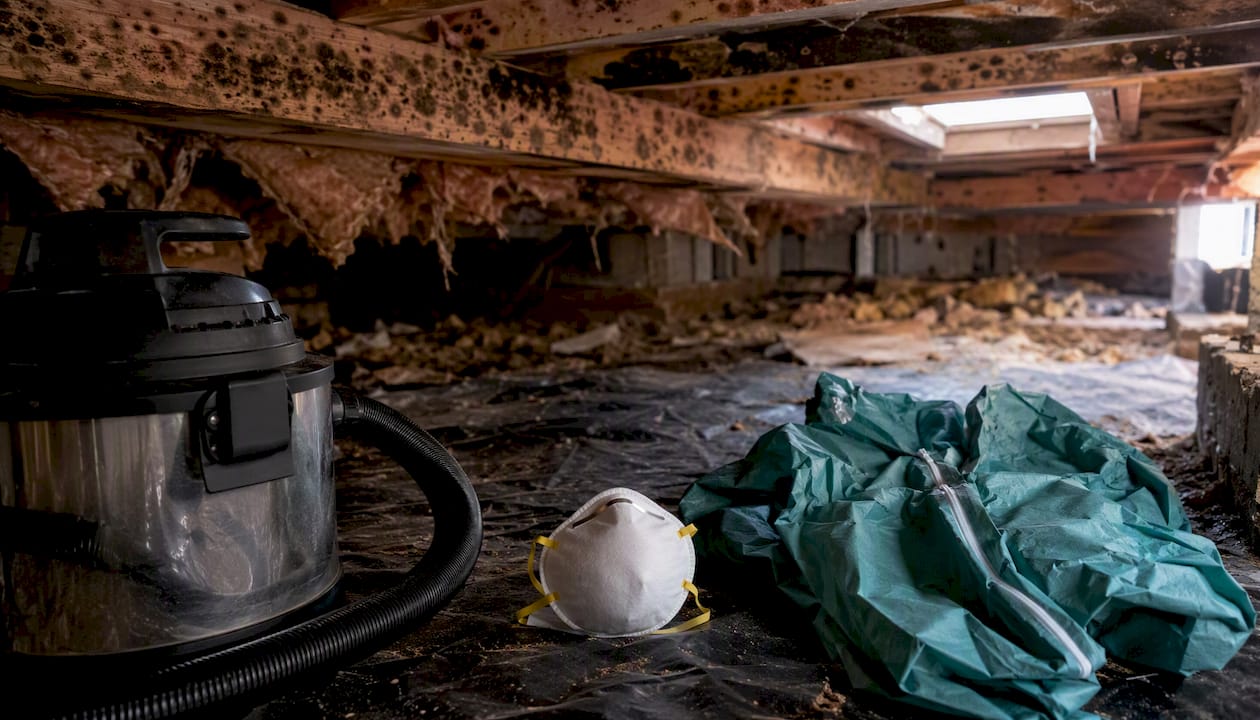
A homeowner can safely remove crawl space mold when the affected area is small and there’s no standing water, structural rot, or HVAC involvement. Anything larger, wetter, or more complicated belongs to a licensed remediation contractor. That’s the rule of thumb Canadian public health guidance points to, and it’s the one we’ll build the rest of this guide around.
The reasoning behind that line isn’t arbitrary. The NCCEH’s evidence review on mould assessment categorizes contamination as small, medium, or large based on approximate affected area size, with small areas typically manageable by homeowners and larger areas requiring professional help. Crawl spaces complicate that math because they’re tight, poorly lit, and often qualify as confined spaces in their own right, which raises the safety bar even for jobs that look small on paper.
Here’s your quick-decision checklist before you do anything else:
- If you see mold covering a small surface area and the area is dry, ventilate it, suit up, and clean it yourself.
- If anyone in the home is pregnant, an infant, elderly, or has asthma or a suppressed immune system, keep them out of the house entirely during the work, not just out of the crawl space.
- If you find standing water, sagging joists, or ductwork running through the contaminated zone, stop and call a licensed contractor before doing anything further.
- If the smell is strong but you can’t find the source within 20 minutes of looking, treat that as a sign the problem is larger than what’s visible.
Pro Tip: Measure the affected area with a tape measure before you decide anything. “About the size of a pizza box” and “about the size of a car hood” lead to very different decisions, and eyeballing it in bad light almost always underestimates the spread.
Key Takeaways
Small, dry, contained crawl-space mould can be cleaned safely with proper PPE, but area, moisture, and structural complications determine when a licensed contractor is the safer and more cost-effective choice.
| Point | Details |
|---|---|
| Know your threshold | Under 10 ft² (1 m²) and dry may be DIY; larger or wet areas always need a professional. |
| Fix the water first | Cleaning without correcting grading, drainage, or ventilation almost guarantees mould returns. |
| Gear up properly | Use a fitted N95 respirator, sealed goggles, gloves, and full containment before starting any cleanup. |
| Verify, don’t assume | Check humidity with a hygrometer and recheck the area at 24 to 72 hours after drying. |
| Call in complications | Hmjcontracting handles medium-to-large, wet, or structurally complicated crawl space jobs with licensed abatement and clear, detailed quotes. |
Table of Contents
- How dangerous is mold in a crawl space, and who’s most at risk?
- When is DIY acceptable, and when should you hire a licensed remediation contractor?
- Before you begin: inspection, safety checklist, and containment basics
- Tools, cleaners, and supplies you’ll need for a safe DIY crawl-space clean
- Step-by-step DIY crawl-space mould removal workflow
- Fix the moisture source and long-term prevention for crawl spaces
- How do you confirm the cleanup actually worked?
- Typical cost and timeline for crawl-space mould removal
- What licensed remediation professionals do differently
- What I’ve learned from years of crawl-space work
- When to call a certified remediation contractor
- Frequently asked questions
- Sources
How dangerous is mold in a crawl space, and who’s most at risk?
Visible mold anywhere in a home is treated as a problem worth fixing, full stop. Health Canada’s residential indoor air quality guideline doesn’t set a numeric exposure limit for mould spores, because species vary too widely and people react to them differently. That absence of a “safe number” is deliberate, not an oversight. The guidance is simple instead: if you can see it, clean it, and fix whatever is feeding it with moisture.
Crawl spaces make this worse than an attic or a basement wall because they sit directly under your living space, often with gaps around plumbing stacks, wiring penetrations, and subfloor seams. Spores and microbial volatile organic compounds can travel upward through those gaps into the rooms above, according to NCCEH’s mould investigation toolkit. You might smell a musty odour in your living room for months before ever suspecting the crawl space is the source.
Health Canada advises that visible mould growth should be treated as a condition to remediate promptly, since no reliable indoor exposure limit exists across the wide range of mould species found in homes.
Some occupants shouldn’t be anywhere near the work zone, full stop. Infants, older adults, anyone with asthma or another respiratory condition, and people with weakened immune systems should stay out of the house during active cleanup, not just avoid the crawl space itself, based on safety guidance from Alberta Health Services. If that describes someone in your household, factor their absence into your timeline before you start tearing into anything.
When is DIY acceptable, and when should you hire a licensed remediation contractor?
The area of contamination is the single biggest variable in this decision, but it’s not the only one. Complicating factors can push a technically small job into professional territory fast, and homeowners who ignore that often end up paying for remediation twice.
| Contamination level | Typical response |
|---|---|
| Small | DIY cleanup with proper PPE is generally acceptable |
| Medium | Careful PPE, containment, and professional consultation recommended |
| Large | Professional remediation required |
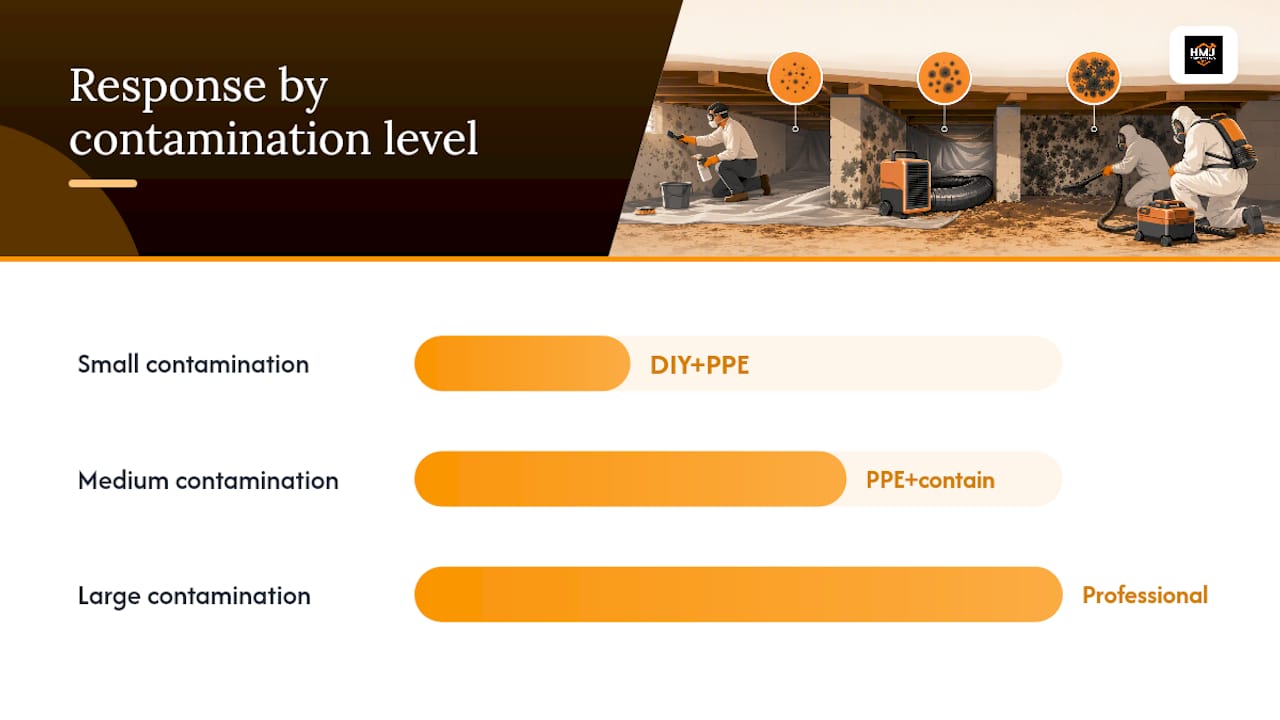
These thresholds come from the NCCEH’s evidence review, and the EACC Mould Abatement Guidelines build on them with formal Level 1, 2, and 3 work-practice classifications. Level 2 and Level 3 projects require containment barriers, specified respiratory protection, and negative-pressure ventilation, controls that need equipment and training most homeowners simply don’t have on hand.
Size alone doesn’t tell the whole story, though. Any of the following should push you toward a professional regardless of square footage:
- Standing water or a history of repeated flooding in the crawl space.
- Contaminated fibreglass or cellulose insulation, which traps spores in a way that’s nearly impossible to fully clean.
- Ductwork or HVAC returns running through or near the mouldy area, since that can spread spores throughout the house.
- Evidence of rodent activity mixed with the mould, which adds a second contamination problem.
- Structural rot in joists, sill plates, or support posts.
- Confined-space conditions where you can’t stand, turn around easily, or exit quickly.
The NCCEH’s own research points out that crawl spaces often function as confined spaces by definition, which is a safety classification, not just an inconvenience. That reality alone is why a lot of contractors, including our crews at Hmjcontracting, treat crawl space work more cautiously than a comparable job in an open basement.
Before you begin: inspection, safety checklist, and containment basics
A proper inspection takes ten minutes and can save you from a much longer, much messier afternoon. Before you even think about gearing up, crawl to the access point (don’t go further yet) and check for a few conditions that should stop you cold.
Look for standing water pooling anywhere near the mould. Check whether the insulation is damp or sagging, which usually means it’s already saturated. Note any exposed knob-and-tube wiring or frayed cable, since crawl spaces in older homes sometimes still have it. Confirm you have decent lighting and enough headroom to work without straining, and figure out where your exit route is before you’re halfway through a task and need it.
Once you’ve cleared those checks, gear up properly. This isn’t a job for a paper dust mask.
- A tight-fitting N95 respirator or better, fit-tested if you have facial hair or an irregular face shape.
- Sealed safety goggles, not open safety glasses, since spores can irritate eyes at close range.
- Disposable coveralls with a hood, taped at the wrists and ankles.
- Nitrile or rubber gloves, long enough to cover past your coverall cuffs.
- A change of clothes and a way to shower immediately after finishing, before you touch anything else in the house.
Containment matters even for small jobs. Seal off the crawl space access hatch with plastic sheeting and tape while you work, and if your HVAC system has a return anywhere near the crawl space, shut the system down before you start. Full negative-pressure ventilation, drawing air out through a filtered exhaust to keep spores from migrating, is a pro-level control that requires specialized equipment; you won’t replicate it with a box fan, so don’t try.
Pro Tip: Set up a “clean” staging area just outside the access hatch with your bagged waste, a spray bottle of water, and your decontamination supplies laid out before you go in. Climbing in and out repeatedly to fetch forgotten tools multiplies how much dust and how many spores end up tracked through the rest of your house.
Tools, cleaners, and supplies you’ll need for a safe DIY crawl-space clean
Your equipment list for a small job is shorter than most people expect, and a lot of it you can rent rather than buy.
- N95 respirator (or higher-rated equivalent), safety goggles, and nitrile gloves.
- A HEPA-filtered vacuum, not a standard shop vac, since ordinary vacuums push fine mould particles right back into the air.
- Stiff-bristled brushes for scrubbing wood surfaces and concrete.
- Two buckets: one for clean solution, one for rinse water.
- A battery-powered work light or headlamp, since crawl space outlets are unreliable at best.
- A hygrometer to measure humidity before, during, and after the work.
- Heavy-duty contractor bags for waste, plus tape to seal them.
For cleaning, keep it simple. Health Canada’s guidance recommends unscented soap and warm water as the first-line cleaner, applied with a scrub brush and followed by rapid drying. That’s not a compromise recommendation, it’s the one backed by results. Research into crawl space remediation projects found that basic physical cleaning combined with proper drying performed as well or better than bleach over the long run, and that bleach sometimes damaged wood and offered no lasting advantage, according to CMHC’s remediation research report. Health Canada’s own advisory on chemical DIY projects echoes that bleach treats staining, not the underlying moisture problem, and can actually mask a job that isn’t finished.
Some equipment belongs strictly to professionals. Dry-ice blasting, soda blasting, and other abrasive methods do work, but they aerosolize spores aggressively and require Level 3 containment controls to use safely. Unvented fogging treatments fall into the same category: effective in the right hands, risky without proper containment. Skip both entirely for a DIY job.
For sourcing, big-box hardware stores carry N95 respirators, coveralls, and basic HEPA vacuums. Equipment rental counters often stock commercial-grade HEPA units for larger cleanups, and specialty safety-supply retailers are your best bet for properly fit-tested respirators if you’re doing this more than once.
Step-by-step DIY crawl-space mould removal workflow
This sequence works for a small, contained job, under roughly 10 square feet, dry, with no structural or utility complications. Follow it in order and don’t skip the stopping points.
- Evacuate at-risk occupants. Anyone with asthma, a compromised immune system, or who is very young or elderly should leave the house, not just avoid the crawl space, for the duration of the work.
- Measure and photograph. Document the size and location of the mould before you disturb it. This protects you if a future buyer or insurer asks questions, and it gives you a baseline to compare against after cleaning.
- Suit up and seal the hatch. Put on your respirator, goggles, gloves, and coveralls, then tape plastic sheeting over the crawl space access to limit spore spread into the house.
- Mist lightly if needed. A light spray of water on heavily dust-covered surfaces (not soaked) keeps loose spores from becoming airborne while you work.
- HEPA vacuum loose debris first. Run the vacuum over affected surfaces before scrubbing to pull up bulk material and reduce what you’re spreading around during cleaning.
- Scrub with soap and warm water. Work in sections, rinsing your brush frequently, and avoid mixing any cleaning products together.
- Remove severely damaged porous materials. Mould-soaked cardboard, paper, or crumbling wood generally can’t be cleaned back to a safe state; bag and remove it instead.
- Damp-wipe and force dry. Wipe down cleaned surfaces one more time, then get air moving through the space (fans, open vents, dehumidifier) until everything is fully dry, ideally within 24 to 48 hours.
- Double-bag all waste. Seal contaminated material in heavy contractor bags, tie them off, then bag again before carrying them out through the house.
- Dispose of bags outside promptly. Don’t stage waste bags in a garage or basement for days; get them to exterior disposal the same day if possible.
Pro Tip: Check your respirator seal every time you re-enter the crawl space, not just once at the start. A quick seal check takes five seconds and heat, sweat, and awkward crawling positions loosen straps faster than you’d think.
Stop immediately and call a professional if you uncover wet rot you didn’t expect, mould spreading well past what you could see from the access hatch, or any sign that ductwork or wiring runs through the contaminated area. Pushing forward past any of those points is how a Saturday afternoon job turns into a much bigger, costlier problem.
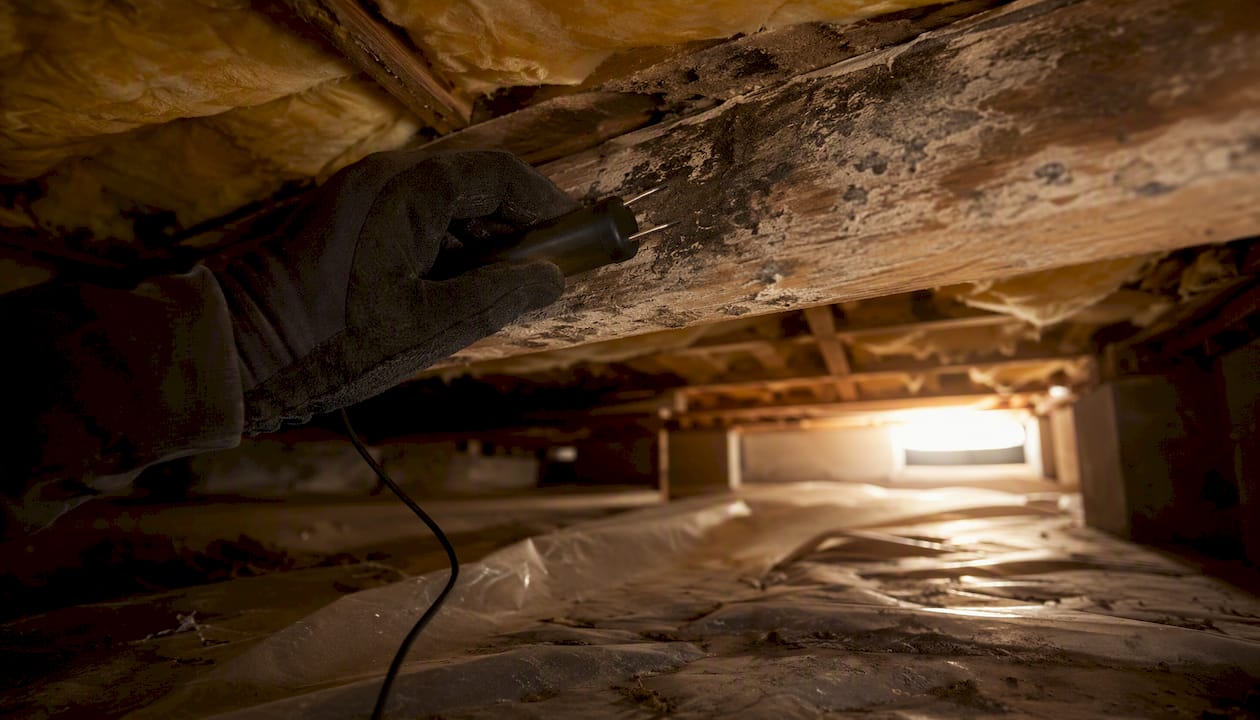
Fix the moisture source and long-term prevention for crawl spaces
Cleaning up mould without fixing what caused it is a temporary win at best. Every guideline referenced in this article circles back to the same point: mould needs moisture to return, so the water source is the real target.
Start outside the house. Check that your ground slopes away from the foundation, that downspouts extend at least 1.8 metres (6 feet) from the house, and that perimeter drainage isn’t clogged or missing. A sump system is worth adding if your crawl space floods seasonally, since it addresses the recurring source rather than the visible symptom.
Inside, a continuous floor vapour barrier makes a measurable difference. Research into crawl space remediation projects found that durable barriers, such as white Permalon™ sheeting, outperformed standard polyethylene over the long term, according to CMHC’s research report. Seal it around every floor penetration, pipe, and post rather than just laying it loosely across the dirt. If your existing insulation was contaminated and removed during cleanup, replace it with a moisture-resistant option rather than putting the same material back in.
A few prevention habits carry a lot of weight:
- Keep crawl space humidity below 60%, with 50% as a stronger target, using a plug-in hygrometer you can check without crawling in.
- Consider a dedicated crawl space dehumidifier if your home has chronic moisture problems that grading and drainage alone don’t solve.
- Improve access and lighting now so future inspections are quick rather than dreaded.
- Walk the crawl space at least twice a year, spring and fall, and after any major storm.
Practical remediation project notes consistently point to the same combination: removing damaged material, repairing structural components, installing continuous drainage and floor barriers, and keeping up a regular inspection schedule, according to CMHC’s findings. Skip any one of those pieces and you’re likely doing this whole process again in a year or two.
How do you confirm the cleanup actually worked?
A clean-looking crawl space right after you finish doesn’t guarantee success. Mould that regrows within a few weeks usually means either the area wasn’t fully dried or the moisture source is still active.
Do a visual and smell check immediately after the work, then again at 24 to 72 hours once everything has had time to dry fully. Any lingering musty odour after that window is a signal worth taking seriously, not something to wait out. Pull out your hygrometer and confirm the space has settled at or below 60% relative humidity, ideally closer to 50%, and log that reading along with the date so you have a record to compare against later.
If mould reappears in the same spot within a few months, or if occupants report renewed symptoms like headaches or respiratory irritation, that’s your cue to call a professional for a re-inspection rather than repeating the DIY clean yourself. A second failure in the same location almost always means a moisture source you haven’t found yet, and repeated cleaning without fixing that source is a losing pattern, echoed in field notes on crawl space remediation from MaddLadder’s guidance on addressing mould in rentals.
Keep a short written record of what you did, when, and what your humidity readings showed. That documentation matters more than most homeowners expect, particularly if you sell the house later or need to file an insurance claim tied to water damage. A folder with dated photos and hygrometer logs answers a buyer’s or adjuster’s questions far better than a verbal assurance that “we took care of it.”
Typical cost and timeline for crawl-space mould removal
Costs for professional crawl space mould removal vary widely because the job itself varies widely. A handful of factors drive most of that range.
Area size is the obvious one, but access difficulty matters just as much. A crawl space with a generous hatch and 90 cm of clearance costs less to work in than one with an 18-inch gap and a hatch buried behind landscaping. The extent of demolition and replacement, whether insulation needs full removal, whether joists need sistering or replacement, adds to both cost and timeline. Drainage or structural repairs (grading, sump installation, sill plate replacement) sit on top of the remediation itself as a separate line item. Containment and any post-job air or surface testing add further cost but also add confidence that the job is genuinely finished.
Timeline breaks down into distinct phases: initial inspection and quote, containment setup, removal and cleaning, any structural or drainage repairs, drying time, and final verification. Drying alone can take a few days depending on ventilation and weather, and rushing that phase is one of the most common reasons mould returns.
When you’re comparing contractor quotes, insist on an itemized breakdown rather than a single lump-sum number. A properly scoped quote separates the remediation work from any moisture-source repairs and includes a defined final verification step, not just a promise that the crew will “clean it up.” If a quote skips the moisture fix entirely, that’s a gap worth asking about before you sign anything.
What licensed remediation professionals do differently
Professional crews follow a more structured process than a DIY cleanup, and understanding that process helps you evaluate whether a quote is thorough or thin.
It typically starts with a site assessment and a written remediation plan that spells out the scope, the containment level, and the expected timeline. For medium and large jobs, crews set up physical containment barriers and negative-pressure ventilation, drawing air out through HEPA-filtered exhaust so spores don’t migrate into the rest of the house during removal. That’s the control a box fan and an open window simply can’t replicate. Removal of contaminated porous materials happens inside that containment, followed by structural repairs where needed, then a final cleaning pass and post-remediation verification before the containment comes down.
Level 2 and Level 3 remediation projects call for containment, specified personal protective equipment, and negative-pressure ventilation to protect both occupants and workers throughout the job.
That structure is why licensing and insurance matter when you’re hiring. A professional remediation workflow built around proper containment protects your home’s air quality during the work itself, not just after it’s done. When you’re getting quotes, ask specifically what containment level the crew plans to use, whether the quote includes post-job testing or verification, and whether the company carries liability insurance for abatement work. A contractor who can answer those three questions clearly and in writing is one worth taking seriously.
What I’ve learned from years of crawl-space work
The biggest mistake homeowners make isn’t underestimating the mould itself. It’s underestimating the moisture behind it. People will scrub a patch clean, feel good about it, and skip the downspout extension or the grading fix that actually caused the problem, then wonder six months later why the same spot is growing again.
Bleach gets blamed on both ends of the spectrum. Some homeowners over-rely on it, thinking a stronger chemical must mean a more thorough job, and end up with warped wood and no better long-term result than soap and water would have given them. Others avoid cleaning altogether because they’re afraid of “doing it wrong,” which just lets the problem grow while they wait.
The inspections that actually help are the boring ones. Photograph everything before you touch it. Write down your hygrometer reading. Keep a simple log with dates. It feels excessive in the moment, but that record is what lets you or a future contractor tell whether a problem is new, recurring, or fully resolved.
Combining a proper cleanup with the moisture repairs, whether that’s regrading, a new vapour barrier, or a dehumidifier, is what makes the difference between a job that lasts and one you’re doing again next spring. Neither piece alone gets you there.
When to call a certified remediation contractor
If your crawl space mould covers more than roughly 10 square feet, involves standing water, touches ductwork, or shows signs of structural rot, that’s your cue to call a licensed contractor rather than keep working solo. The same goes for any household with an infant, an elderly resident, or someone managing asthma or a weakened immune system. Those aren’t situations to gamble on a weekend project.

Hmjcontracting handles the jobs that fall outside safe DIY territory, licensed abatement for asbestos, mould, and lead, with itemized quotes so you know exactly what you’re paying for before work starts. There’s no vague lump sum and no surprise line items after the crew shows up. Before we arrive, clear a path to the access hatch, gather any photos or humidity logs you’ve already taken, and note where your HVAC returns run relative to the crawl space. That prep alone often shaves real time off a job.
Our team has handled hundreds of Ottawa-area mould remediation projects, from small isolated patches to full crawl space overhauls involving drainage and structural repair. If you’re not sure which category your situation falls into, that’s exactly what a free estimate is for. Get in touch with Hmjcontracting and we’ll walk your crawl space, measure what’s actually there, and give you a straight answer on whether this is a DIY weekend or a professional job, along with an itemized quote either way.
Frequently asked questions
Can I remove mold in a crawl space myself, or do I always need a professional? You can handle small, dry, contained mould yourself with proper PPE and containment. Once the area passes roughly 10 ft² (1 m²), or involves standing water, structural rot, or HVAC contact, hire a licensed remediation contractor instead.
What are the clearest signs of mould in a crawl space? A persistent musty odour in the rooms above, visible dark or white patches on joists or subflooring, and damp or sagging insulation are the most common indicators. A flashlight inspection every six months catches most problems early.
Is bleach safe and effective for crawl space mould removal? Unscented soap and warm water perform as well or better than bleach for most surfaces, and bleach can damage wood without offering a lasting advantage. Reserve stronger biocides only for situations where a professional specifically recommends them.
How much does professional crawl space mould remediation typically cost? Cost depends on area size, access difficulty, the extent of material replacement, and any drainage or structural repairs needed. Ask for an itemized quote that separates remediation from moisture-source repairs so you can compare estimates fairly.
How do I know the mould won’t come back after cleaning? Confirm crawl space humidity stays at or below 60% using a hygrometer, and check the area again at 24 to 72 hours after drying and periodically afterward. Recurrence within a few months usually means the underlying moisture source still needs attention.
This article is general information, not a substitute for advice from a qualified doctor. Consult a qualified healthcare professional about your own circumstances before acting on anything here.
Sources
A few official documents cover this topic more thoroughly than any single blog post can, and they’re worth bookmarking if you’re weighing a DIY decision.
- Mould assessment evidence review (NCCEH) March 2014
- Crawl space remediation research report (CMHC / government publication)
- EACC mould abatement guidelines (Edition 3, 2015)