
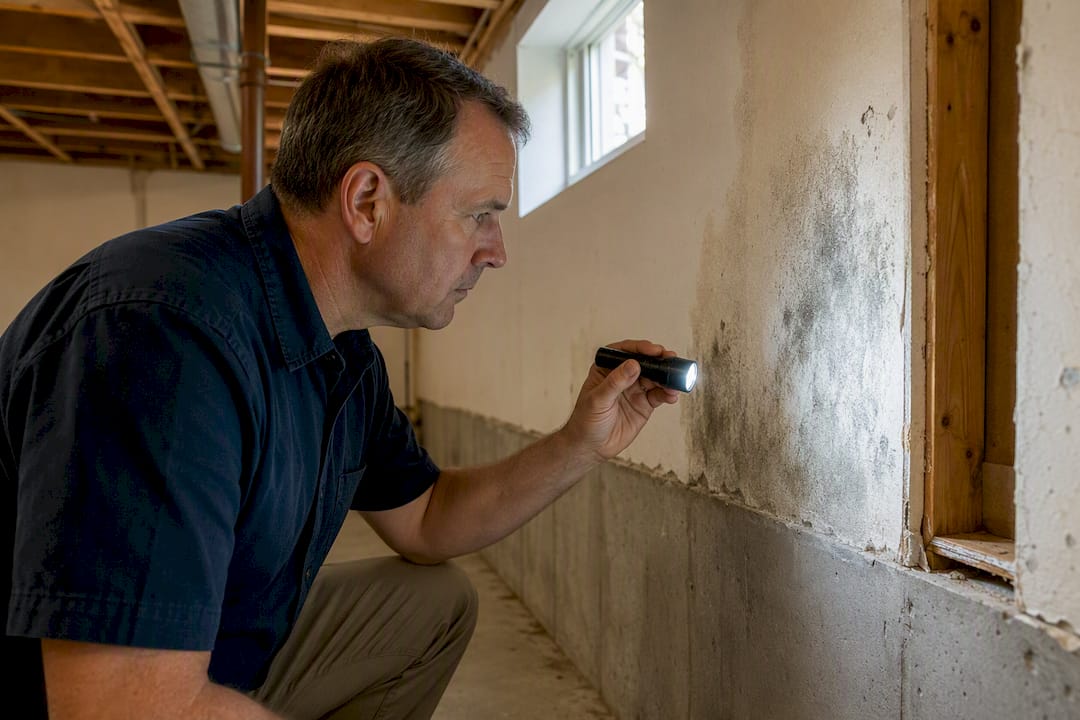
Mould itself is rarely a stand-alone covered peril. It’s usually paid for only when it clearly traces back to a sudden, accidental, covered water event, such as a burst pipe, a sudden appliance failure, or a storm-related roof breach, and you report and mitigate the damage promptly. Most policies treat mould as secondary damage tied to an insured cause, not as a peril on its own.
The events that typically get paid: burst supply lines, washing machine or dishwasher failures that happen suddenly, roof damage from a wind or hail storm, and water used by firefighters. What usually gets denied: slow leaks under a sink, long-term basement seepage, or humidity you let sit for months.
The moment you spot mould, protect your claim:
- Stop the water source immediately.
- Photograph everything, with a phone timestamp visible.
- Write down the date you discovered it.
- Start emergency drying with fans or a dehumidifier.
- Call your insurer the same day, not next week.
Pro Tip: An insurer’s first question is almost always “when did this start?” A dated photo answers that question before an adjuster even asks it.
Key Takeaways
Home insurance pays for mould only when it clearly follows a sudden, accidental, covered water event, and the strength of your documentation determines whether that claim succeeds.
| Point | Details |
|---|---|
| Cause determines coverage | Sudden events like burst pipes are usually covered; gradual leaks and humidity usually aren’t. |
| Document within days | Date-stamped photos and mitigation receipts from day one carry the most weight with adjusters. |
| Check your endorsements | Sewer backup and overland water coverage are separate add-ons standard policies exclude. |
| Watch your mould sub-limit | Caps commonly run $1,000 to $10,000, regardless of your overall dwelling coverage. |
| Certified reports close claims | A remediation scope of work plus clearance testing gives adjusters exactly what they need to approve. |
| Denials aren’t final | Broker review, appraisal, an FSRA complaint, or a public adjuster are all real options after a denial. |
Table of Contents
- How insurers decide: sudden and accidental vs gradual and maintenance
- Common moisture sources and how insurers typically view them
- What to do the moment you find mould
- How a mould insurance claim typically proceeds
- Endorsements and add-ons worth checking with your broker
- If your mould claim gets denied: your next moves
- Why certified remediation and clearance testing matter for your claim
- Get certified mould remediation that insurers trust
- The gap between policy language and what homeowners actually experience
- Frequently asked questions
- Sources
How insurers decide: sudden and accidental vs gradual and maintenance
Insurance contracts hinge on one distinction: was the water loss “sudden and accidental,” or did it happen gradually over time? A pipe that bursts on a Tuesday afternoon is sudden. A pipe that’s been weeping behind a wall for eight months is gradual, and gradual losses fall under maintenance responsibility, which homeowners carry themselves. Standard policy wording spells this out directly, excluding fungi or mould that results from wear, tear, gradual deterioration, or wet and dry rot.
Adjusters trace cause by working backward from the mould to its source. They look at how long moisture appears to have been present, whether the damage pattern matches a single event or ongoing seepage, and whether you reported it within a reasonable window. A Texas Department of Insurance consumer guide sums up the same logic that applies broadly across North American home policies: mould tied to sudden accidental damage is commonly covered, while mould from a gradual leak typically isn’t, though mitigation coverage can sometimes be added separately.
The specific evidence adjusters ask for tends to be consistent across insurers:
- Date-stamped photos from the day you discovered the problem.
- Invoices from any emergency mitigation work you paid for.
- A professional assessment or remediation report identifying the water source.
- Repair records showing when the originating issue was fixed.
- Any prior maintenance or inspection records for that area of the home.
Insurers don’t care how the mould smells or looks. They care about the paper trail connecting it to a specific, insured moment.
Common moisture sources and how insurers typically view them
Different water problems get very different treatment, and knowing where your situation lands before you call your insurer saves you time and frustration.
| Moisture source | Insurer’s likely view | Mould coverage likelihood |
|---|---|---|
| Burst pipe | Sudden, accidental peril | Likely covered |
| Appliance failure (washer, dishwasher) | Sudden, accidental peril | Likely covered |
| Storm-related roof breach | Sudden, accidental peril | Likely covered |
| Sewer backup | Excluded without endorsement | Covered only with sewer backup add-on |
| Overland flooding | Excluded without endorsement | Covered only with overland water add-on |
| Slow foundation seepage | Gradual, maintenance-related | Usually excluded |
| Condensation or chronic high humidity | Maintenance-related | Usually excluded |

Two caveats matter more than the table itself. First, endorsements change everything. A sewer backup listed as “excluded” flips to “covered” the moment you’ve purchased that add-on, subject to its own limit and deductible. Second, pre-existing mould, meaning damage that started before your policy took effect or before an obvious triggering event, almost never qualifies regardless of cause.
Timing shifts outcomes too. Report a burst pipe within days and mitigate immediately, and you’re working with a clean, defensible timeline. Wait three weeks and the mould has spread past what a burst pipe alone would explain, and insurers reasonably ask whether ongoing neglect, not the pipe, caused most of the damage. Restoration Canada notes that insurers focus on the originating water event rather than the mould itself, which is exactly why prompt reporting and mitigation carry so much weight in how a claim resolves.
What to do the moment you find mould
Finding mould triggers a short window where your actions either build your claim or quietly undermine it. Work through these steps in order.
- Assess the danger first. Small surface patches on a tile or window sill are usually safe to clean yourself with basic protective gear. Anything larger than roughly one square metre, or mould near HVAC ducts, calls for a certified professional rather than a DIY scrub.
- Stop the water. Shut off the supply line, unplug the failed appliance, or tarp the roof breach. You can’t mitigate mould while the source is still active.
- Document before you touch anything. Photograph and video every affected surface, with a phone date stamp, before you move damaged items or start drying.
- Bring in drying equipment. Fans and a dehumidifier running within 24 to 48 hours of discovery show an insurer you acted, not delayed.
- Keep the damaged materials. Don’t haul out soaked drywall or carpet until an adjuster has seen it, or at minimum photographed it thoroughly.
- Save every receipt. Mitigation equipment rentals, emergency plumber invoices, and hotel costs if you’re displaced all belong in your claim file.
- Call a certified remediation contractor once the area exceeds what a homeowner can safely handle, and ask them specifically for a written scope of work and post-remediation clearance testing, the two documents adjusters rely on most.
Pro Tip: Keep a single folder, digital or physical, from day one. Adjusters move faster on claims where the timeline is already organized for them.
How a mould insurance claim typically proceeds
Once you report the loss, an adjuster is assigned and usually inspects within days to a couple of weeks. Their job is narrow: determine what originally caused the moisture, not to evaluate the mould as a standalone problem. Everything else in the claim flows from that determination.
Certified remediation reports carry real weight here. A licensed remediation firm’s scope of work, paired with lab clearance results showing the space is safe post-treatment, gives the adjuster exactly what they need to connect cause and completion in one package.
Insurers commonly accept reports from certified remediation firms that document the originating cause, the scope of work performed, and post-remediation clearance. That paperwork often does more to move a claim forward than any amount of back-and-forth phone calls.
Claims typically separate into two cost buckets: remediation (removing and treating the mould itself) and reconstruction (replacing drywall, flooring, or cabinetry that had to come out). Your deductible applies once to the overall claim, but a separate mould sub-limit often caps only the remediation portion, which is where homeowners get surprised.
A few habits keep disputes from starting in the first place:
- Get an itemized quote from your remediation contractor before work begins.
- Keep every receipt tied to the claim in one file, digital or paper.
- Ask your adjuster in writing what specifically they need to close the file.
Endorsements and add-ons worth checking with your broker
Standard policies leave real gaps that only show up when you’re already dealing with a wet basement. A handful of endorsements close those gaps, and it’s worth walking through each one with your broker before you need it, not after.
- Sewer backup endorsement covers water and mould from a backed-up sewer or sump pump failure, a scenario standard policies exclude outright. Limits commonly run $5,000 to $25,000 depending on the insurer, often with their own deductible separate from your main policy deductible.
- Overland water or flood coverage applies when water enters from outside, think spring runoff or an overflowing creek, rather than through the sewer system. Without this endorsement, basement mould from flooding is almost never covered.
- Hidden water escape riders extend coverage to slow leaks inside walls or under floors that you couldn’t reasonably have detected, closing part of the “gradual deterioration” exclusion.
- Enhanced mould protection riders raise your mould sub-limit above the standard cap, which matters most for finished basements or homes with extensive drywall.
Ask your broker directly: does my current policy cover a sump pump failure? What’s my mould sub-limit as written today? Those two questions alone reveal most of the coverage gaps homeowners discover too late.
Costs and typical mould sub-limits: what to expect financially
Mould sub-limits are where homeowners get blindsided. Even with a generous dwelling limit, many policies cap mould remediation somewhere between $1,000 and $10,000, a fixed dollar ceiling that applies regardless of your overall coverage.
A small bathroom patch might run $1,500 to $3,000 to remediate, comfortably inside most sub-limits. A finished basement with extensive drywall, insulation, and flooring removal can climb past $15,000 once reconstruction is added, leaving a real gap between what your sub-limit pays and what the job costs. Increasing your mould rider, phasing the work, or negotiating scope directly with your adjuster are the three practical levers for closing that gap.
Preventing mould and keeping records that protect coverage
Prevention does double duty: it stops mould before it starts, and it builds the maintenance record that protects you if something does slip through.
- Keep indoor humidity below 60%, ideally 40 to 50%, with a hygrometer or smart thermostat reading.
- Fix plumbing leaks within days, not months, of noticing them.
- Clean gutters and check that grading slopes away from your foundation each spring.
- Keep a simple log with dates, repair invoices, and any inspection notes.
Pro Tip: A one-page maintenance log costs nothing and takes ten minutes a year to update, but it’s often the single document that convinces an adjuster your home wasn’t neglected.
High-risk basements or older Ottawa-area homes with aging foundations are worth a professional waterproofing assessment before a problem forces the issue.
If your mould claim gets denied: your next moves
A denial isn’t final, and Ontario homeowners have several real paths forward. Work through them roughly in this order:
- Request the denial in writing, with the exact policy clause cited, and compare it line by line against your declarations page.
- Go back to your broker first. They often catch misapplied exclusions or missing endorsement details faster than a formal appeal.
- File an internal appeal with the insurer if the broker route doesn’t resolve it.
- Invoke the appraisal clause in your policy if the dispute is purely about the dollar value of the loss, not whether it’s covered.
- File a complaint with FSRA, Ontario’s financial services regulator, if you believe the insurer misapplied its own policy wording.
- Hire a public adjuster for larger claims where professional negotiation could recover a meaningfully bigger settlement.
- Consult an insurance lawyer when the amount in dispute justifies legal costs, typically for claims well into five figures.
Each step costs more time or money than the last, so match the option to the size of what’s at stake.
Why certified remediation and clearance testing matter for your claim
Adjusters aren’t mould experts. They rely on paperwork from people who are, which is exactly why the deliverables a certified remediation firm produces carry so much weight in a claim file.
The documents insurers consistently accept:
- A detailed, itemized scope of work identifying the affected area and materials.
- Laboratory clearance results confirming the space is safe post-treatment.
- Itemized invoices separating remediation costs from reconstruction costs.
- A post-remediation clearance certificate closing out the file.
HMJ Contracting builds every Ottawa-area project around that exact evidence chain: licensed abatement work, laboratory-backed clearance testing, and itemized documentation that adjusters recognize on sight. Homeowners working with any contractor should verify licensing and insurance directly, and insist on a written quote and a formal post-remediation clearance report before signing off on any job tied to an insurance claim.
Get certified mould remediation that insurers trust
If you’ve found mould after a leak, appliance failure, or roof damage, the paperwork you gather in the first 48 hours often decides how your claim ends. HMJ Contracting handles licensed, insured mould remediation and testing across Ottawa, producing the itemized scopes, clearance results, and completion certificates adjusters ask for. A free, detailed quote walks you through exactly what your specific situation needs before work starts, not after.

The gap between policy language and what homeowners actually experience
Most coverage guides treat mould like a yes-or-no question, and that framing sets homeowners up to lose claims they might otherwise have won. The real issue was never whether mould is covered. It’s whether you can prove, with dated evidence, that a specific insured event caused it within a reasonable timeframe.
Conventional advice tells people to “call their insurer right away,” which is true but incomplete. The homeowners who get paid are the ones who treat the first 48 hours like evidence collection, not cleanup. A phone camera and a dehumidifier, used immediately, do more for a claim than any amount of arguing with an adjuster three weeks later.
The other blind spot is sub-limits. Homeowners assume a large dwelling limit protects them everywhere, and it doesn’t. A basement remediation that runs past a $5,000 cap becomes a homeowner’s problem overnight, endorsement or not. Read your declarations page before you need to, not after.
Frequently asked questions
Does home insurance cover mold caused by a burst pipe? Yes, in most cases. A burst pipe is a sudden, accidental event, and mould resulting from it is typically covered as part of the water damage claim, provided you report and mitigate promptly.
Does home insurance cover basement mold from flooding? Usually not, unless you’ve purchased overland water or flood coverage as an endorsement. Standard policies generally exclude flood-related water damage, including any mould that follows.
What documents do I need for a mould remediation insurance claim? Date-stamped photos, mitigation receipts, a professional remediation scope of work, and post-remediation clearance testing results are the core documents insurers rely on.
How much does home insurance typically pay toward mould remediation? Many policies cap mould coverage between $1,000 and $10,000 through a sub-limit, separate from your overall dwelling coverage, which can leave a gap on larger jobs.
What should I do if my mould claim is denied? Request the denial in writing with the exact policy clause cited, review it with your broker, and escalate through internal appeal, appraisal, an FSRA complaint, or a public adjuster if needed.
This article is general information, not a substitute for advice from a qualified financial advisor. Consult a qualified financial professional about your own circumstances before acting on anything here.
Sources
- Homeowner
- Residential Homeowners comprehensive policy (policy wording) - Axiom Mutual
- Is mould covered by home insurance? - Acera
- Does Home Insurance Cover Mold Removal in Ontario? | Wright Restorations