
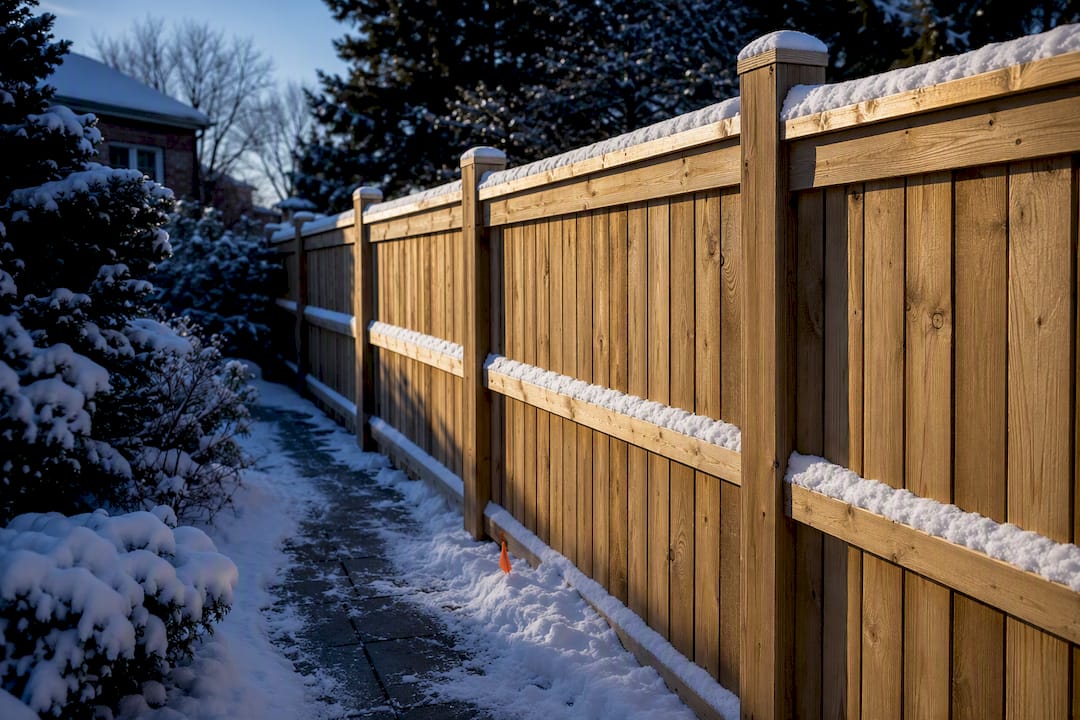
For most homeowners, a horizontal cedar slat or board-on-board wood fence gives the best mix of privacy, curb appeal and cold-climate durability. Vinyl costs more upfront but needs almost no upkeep, while budget DIY builds save cash if you get the posts right. The details below break down which idea fits your yard, your winter, and your wallet.
TL;DR:
- Wooden fences like board-on-board or horizontal cedar panels typically cost between $20 and $60 per linear foot, with installation lasting from one to five days.
- Vinyl and composite fences tend to last 20 to 30 years with minimal maintenance, but they come at higher initial costs compared to wood, especially on larger spans.
- Proper frost-resistant posts set in concrete are crucial for longevity, as they prevent leaning and damage from ground heave, unlike simple gravel-set wood posts.
- Fences in Ontario are generally limited to about 2.13 meters in height, with permits necessary for taller structures, and shared boundary costs are common under the Line Fences Act.
- Starting with a small project, like a single panel with a planter box, offers a practical way to learn post-setting and fencing basics before committing to a full yard installation.
Table of Contents
- Privacy fence ideas worth building this year
- What do privacy fence materials cost and how long do they last?
- How do you design a fence that feels private, not like a wall?
- Should you DIY your privacy fence or hire a pro?
- What permits and bylaws apply to a privacy fence?
- Why the posts matter more than the picket
- How accessible is your fence, and what about the gate?
- How long does a privacy fence take to install?
- Get a free estimate for your privacy fence project
- A good first project to actually get started
- Sources
Privacy fence ideas worth building this year
Every idea on this list balances three things: how it looks, what it costs installed, and how it holds up once the ground freezes and heaves every spring. Frost is not gentle on fences, and the posts matter more than most homeowners expect.
- Board-on-board wood fence. Two overlapping rows of boards close every gap without looking flat. Installed cost runs $20 to $60 per linear foot, and it looks good from both sides, which matters if you share the fence line with a neighbour. Moderate DIY difficulty since alignment takes patience.
- Horizontal slat cedar fence. The modern favourite for a reason. Clean lines, contemporary look, and cedar’s natural resistance to rot makes it a strong pick for wet Ottawa springs. Sits at the higher end of the wood cost range and needs precise, level framing, so budget extra time if you’re doing it yourself.
- Tongue-and-groove wood fence. This joinery style locks boards edge to edge for a genuinely windproof, gapless surface, unlike overlapped boards that can shift slightly over time as noted in general tongue-and-groove construction references. Higher material cost and skilled labour required. Not a first-timer DIY project.
- Painted or contrasting-post design. Black or charcoal posts against light cedar panels give a custom look for the price of a few cans of exterior paint. Low added cost, easy weekend upgrade to an existing wood fence.
- Vinyl solid privacy panels. No staining, no rot, no yearly maintenance. Higher installed cost than wood but the lowest lifetime labour, a trade worth comparing in vinyl versus wood fence performance for cold climates. DIY assembly of pre-made panels is straightforward; digging and setting posts below frost line is not.
- Composite slat panels. Splits the difference between wood’s look and vinyl’s low maintenance, though it carries a premium price tag most homeowners weigh against composite versus wood decking economics before committing.
- Corrugated metal panel fence. An industrial look that’s having a real moment. Durable against wind and moisture, moderate installed cost, but cutting and fastening metal safely leans toward a pro job.
- Aluminum panels with privacy inserts. Slim, modern, and rust-resistant. Pricier than wood per foot but essentially maintenance-free once installed. Straightforward for a contractor, fiddly for a first-time DIYer.
- Hedge or living screen. Cedar hedging or dense shrubs planted along a property line cost far less upfront than any built fence and improve every year instead of degrading. Slowest option since full privacy can take three to five growing seasons.
- Trellis with climbing plants. Add a simple wood or metal trellis to an existing shorter fence and let clematis or climbing hydrangea fill the gap. Cheap add-on, moderate patience required.
- Planter-integrated fence. Built-in planter boxes along the fence base soften a hard wood or metal line and give you a place to grow more screening plants. Small material cost added to any panel style.
- Pallet fence. The cheapest option on this list, often near-free if you source pallets locally, but expect a rustic look and a shorter lifespan without careful sealing.
- Pre-made panel fence. Buying panels instead of building board by board cuts labour time dramatically, a point BuildEstimatory’s pricing research backs up when comparing DIY hours against installed jobs. Easiest true DIY option for beginners.
- Staggered slat partial screen. Boards spaced with small gaps instead of tight together, angled to block sightlines while still letting air and light through. Lower material cost than solid fencing and a good middle ground for a windy backyard.
Pro Tip: Before you fall in love with a look, check whether the fence will run alongside a shared boundary. A style that pleases your neighbour too often means less friction later, and in Ontario, boundary fences can carry shared cost obligations under the Line Fences Act.
What do privacy fence materials cost and how long do they last?
Material choice drives both your upfront bill and your maintenance calendar for the next two decades. A fence is a structure you’ll look at every day for years, so the cheapest option today isn’t always the cheapest option by year fifteen.
By the numbers: Installed privacy fencing in Canada runs roughly $20 to $60 per linear foot, meaning a typical 150 foot run costs $3,000 to $6,000 in DIY materials or $6,000 to $12,000 fully installed.
Rough lifespan and maintenance by material:
- Pressure-treated wood — lowest upfront cost, 10 to 15 years before major repair, annual staining recommended.
- Cedar — mid-range cost, 15 to 25 years with regular sealing, a comparison worth reading against pressure-treated alternatives.
- Vinyl — higher upfront cost, 20 to 30 years, essentially maintenance-free.
- Composite — premium cost, similar lifespan to vinyl, occasional cleaning only.
- Chain link with privacy slats — cheapest per foot, 15 to 20 years, slats fade and need replacing.
- Metal panels — mid to high cost, 25+ years, minimal upkeep beyond rust checks.
Post type changes this math entirely. Steel-core posts set in full concrete encapsulation resist frost heave far better than a wood 4x4 dropped in gravel, which means fewer leaning panels and fewer repair calls over the years. To cut costs without cutting corners, order materials in late fall when demand drops, choose pre-made panels over board-by-board builds, and ask a neighbour to split costs on a shared boundary line.
How do you design a fence that feels private, not like a wall?
Solid, gapless panels give you total privacy but can make a small yard feel boxed in. Slatted or staggered designs let air and light through while still blocking direct sightlines, which matters more than people expect once the fence is actually standing.
A few design moves change the whole feel:
- Add a lattice top above a solid lower section to keep ground-level privacy while opening up the skyline.
- Use planter boxes at the base to break up a long, flat run visually.
- Angle corner screens instead of running everything at 90 degrees to soften sharp lines.
- Stagger panel heights along a slope rather than stepping them evenly.
- Paint in horizontal bands or choose horizontal boards over vertical ones. Horizontal lines make a fence read as wider and lower rather than tall and closed in.
One exception overrides all of the above: pool enclosures. Municipal bylaws, including Toronto’s pool enclosure rules, require self-closing, self-latching gates and specific height and spacing standards. Privacy takes a back seat to safety compliance around a pool, full stop.
Should you DIY your privacy fence or hire a pro?
DIY makes sense for assembling pre-made panels, staining and finishing, and planting living screens. It’s real, hands-on work but forgiving of small mistakes.
Hire a pro when the job involves digging post holes below the frost line, building on rocky or sloped ground, managing permits, or final grading. Here’s a simple way to plan the split:
- Rent a two-person auger (roughly $80 to $120 a day) for post holes instead of digging by hand.
- Set posts in concrete and let them cure fully before hanging panels.
- Assemble or hang pre-made panels yourself to cut labour costs.
- Call in a contractor for anything below frost line depth or on difficult terrain.
DIY can save 40 to 60% on labour costs, but shallow post holes and unlevel posts are the most common failures homeowners run into.
Pro Tip: Dig at least one test hole before ordering materials. If you hit rock or heavy clay at 18 inches, that’s your sign to call a contractor before you’ve bought a single panel.
What permits and bylaws apply to a privacy fence?
Most municipalities cap fence height around 2.0 to 2.13 metres and require permits above that, with different rules for front yards versus side and rear yards. Pool enclosures face stricter standards regardless of general fence limits.
- Check your municipality’s zoning bylaw page or call the permits office directly before designing anything.
- Look at examples like Edmonton’s privacy screen height table or London’s fence bylaw for how height and placement rules are typically written.
- Ask about shared boundary obligations, since provincial rules like Ontario’s Line Fences Act can affect cost-sharing with a neighbour.
- Budget time for permit paperwork if your project exceeds standard height limits.
Why the posts matter more than the picket
Many fences fail early, and it’s almost never the picket style at fault.
Steel-core posts set with full concrete encapsulation resist frost heave dramatically better than wood posts dropped in gravel. That substructure choice determines whether a fence stays plumb for decades or starts leaning after two winters.
Picket material is the part everyone notices. The posts are the part that decides whether you’re rebuilding in year five. Homeowners who want that substructure done right can look at Hmjcontracting’s decking and fencing services for a build that’s engineered for frost from the ground up.
How accessible is your fence, and what about the gate?
A beautiful privacy fence still needs a gate that actually works for everyone using the yard. Standard gate widths run 36 to 48 inches, but if the gate needs to accommodate a wheelchair, mobility scooter, wide stroller, or a wheelbarrow for yard work, aim for at least 42 inches clear width, ideally wider.
Latch height matters too. A latch mounted too high is a real barrier for someone with limited reach or grip strength, so consider lever-style hardware mounted around waist height instead of the classic gravity latch that needs a strong upward push. Threshold design counts as well. A raised sill or uneven paving stone at the gate base can catch a wheel or a cane, so a flush, level transition from path to yard avoids that problem entirely.
For privacy at the gate itself, match the panel style rather than defaulting to a see-through option. A solid board-on-board or vinyl gate keeps sightlines blocked exactly where people tend to look, right at the entry point. If the gate sits on a slope, a diagonal-cut bottom edge keeps a consistent gap for swing clearance without sacrificing height where it counts.
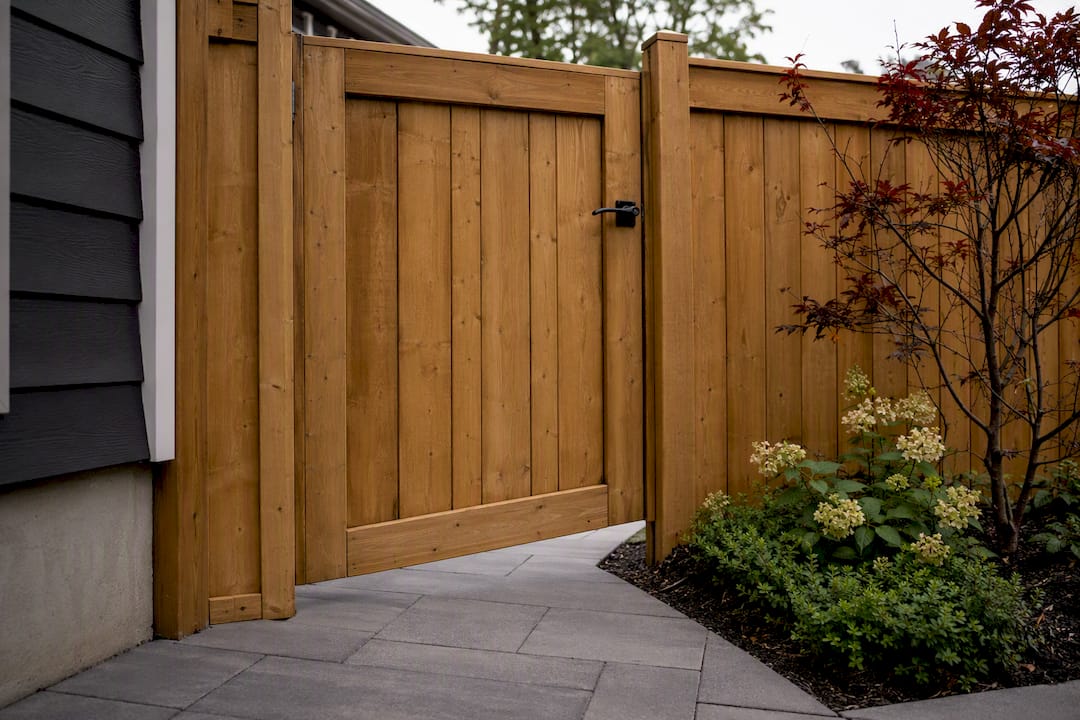
Automatic gate openers exist for larger properties, but for most residential privacy fences, a wider opening and better hardware solve accessibility issues without adding mechanical complexity or a new maintenance item to track every spring.
How long does a privacy fence take to install?
Installation timelines vary more by post work and weather than by picket style, and it helps to plan around Ottawa’s frost season rather than fighting it.
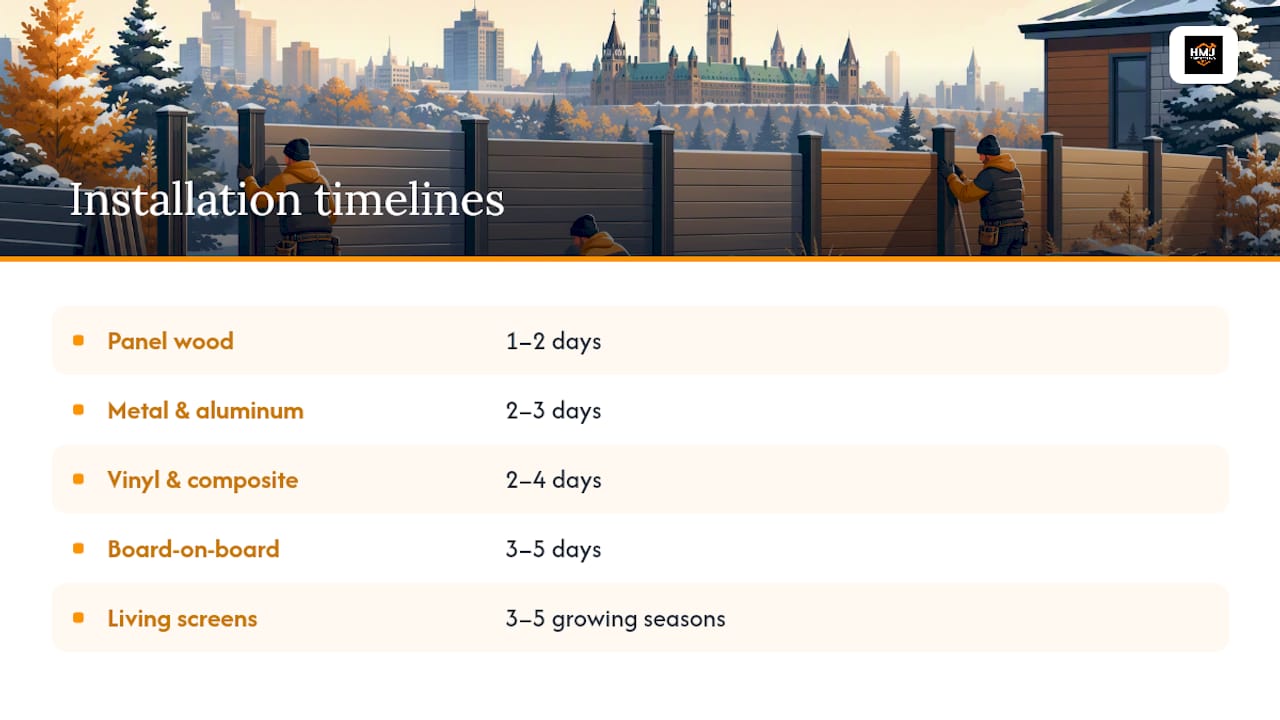
A pre-made panel fence on flat, easy ground typically takes one to two days for a small to mid-size yard, since the panels themselves arrive ready to hang once posts are set. Board-on-board or horizontal slat wood fences built piece by piece usually take three to five days, largely because of the extra framing and alignment work. Vinyl and composite installations often land in the same two to four day range as panel wood, since both rely on pre-fabricated sections.
Metal panel and aluminum fencing generally takes two to three days for a standard residential run, assuming no custom cutting is needed on site. Living screens are the outlier. Planting a hedge takes a single afternoon, but reaching full privacy coverage takes three to five growing seasons, so factor that lag into your planning if privacy is the immediate goal.
The real variable across every material is concrete cure time. Posts need to set before panels go on, and in cooler weather that curing process takes longer, sometimes adding a day or two to any project timeline. Scheduling a build in late spring through early fall avoids frozen ground entirely and lets concrete cure at a predictable rate, which is why most contractors book heavily in that window.
Get a free estimate for your privacy fence project
If you’d rather skip the auger rental and the frost-line guesswork, Hmjcontracting handles the whole job from design through permit paperwork.

Some contractors offer custom fence and deck installation, permit assistance, and full-project contracting for homeowners who want a fence built once and built right. A free estimate can provide an itemized quote covering materials, steel-core post work, and concrete encapsulation depth appropriate for the site, so there’s no guessing about what frost protection actually costs. The same team handling your fence can also speak to renovation or abatement needs if your property has other work on the horizon. For homeowners still narrowing down a look, the free design centre is worth a browse before the estimate call. Ready to move forward? Request a free estimate through Hmjcontracting’s fencing and decking services and get a firm, itemized quote before you commit to a single panel.
A good first project to actually get started
Skip the whole-yard plan and build one 6-foot panel with an attached planter box first. It teaches you post-setting, costs little, and shows you exactly what a full run will demand.
Quick checklist: measure your run, confirm local height and permit rules, pick one material, then get a single pro quote to compare against your own numbers before deciding.
— Jason
Sources
- How much does a fence cost? 2026 price guide | BuildEstimatory
- Ontario
- 5.100 Residential fences and privacy screens | City of Edmonton zoning bylaw
- Fence law PS-6 | City of London
- ASR Engineers: post and fence guidance