
Encapsulation is a safe, accepted method for managing intact lead-based paint when surfaces are tested first and proper procedures are followed. Health Canada recognises encapsulation as a legitimate control strategy, provided the paint is not chipping, not on friction surfaces, and not within reach of children. Three conditions determine whether it is appropriate:
- The paint surface is intact, stable, and not generating dust
- The area is not subject to friction wear (window sills, stair railings, door frames)
- Children cannot mouth or chew the surface
Authoritative backing comes from Health Canada's lead-based paint guidance, laboratory accreditation through the Standards Council of Canada and the Canadian Association for Laboratory Accreditation (CALA), and licensed local abatement contractors like Hmjcontracting, which serves Ottawa-area homeowners with certified workflows and itemised quotes.
Key takeaways
Safe lead paint encapsulation is a Health Canada-recognised option for intact, non-friction surfaces, but it requires accredited testing first and a licenced contractor whenever removal is needed.
| Point | Details |
|---|---|
| Test before any work | Use a certified inspector or CALA-accredited lab; never assume paint is lead-free by building age alone. |
| Encapsulation suits intact surfaces | Appropriate for stable, non-chipping paint away from friction zones and out of children's reach. |
| Avoid aerosol-generating tools | Sanding, heat guns, and open flame release lead dust; wet methods and HEPA vacuums are required. |
| Regulatory lead limit | Lead content in dried surface coatings is regulated to a maximum level of 90 mg/kg under Canadian law. |
| Hmjcontracting for Ottawa properties | Provides licenced abatement, testing coordination, itemised quotes, and post-job clearance documentation. |
Table of Contents
- What does safe lead paint encapsulation actually mean?
- How do you confirm paint contains lead before any work begins?
- Step-by-step safe encapsulation methods and approved materials
- When is encapsulation not the right choice?
- How do you hire a licensed abatement contractor in Canada?
- What do encapsulation and removal typically cost and how long do they take?
- How do you maintain encapsulated surfaces over time?
- An expert perspective on encapsulation decisions
- Hmjcontracting: licenced abatement and testing coordination for Ottawa homeowners
- Sources
What does safe lead paint encapsulation actually mean?
Encapsulation controls lead hazards by sealing the paint rather than removing it. There are two distinct approaches, and choosing the wrong one for your surface is where many property owners go wrong.
Physical barriers include gypsum wallboard, wood panelling, and vinyl wallpaper installed over the existing surface. These create a durable separation between the lead paint and occupants, and they tend to outperform coatings in high-traffic or moisture-prone areas.
Encapsulant coatings are specially formulated primers and paints designed to bond with and seal lead paint beneath multiple coats. Standard decorative paint is not a substitute. Products must be marketed specifically for lead encapsulation to provide the adhesion and film thickness needed.
Encapsulation is appropriate when:
- Paint is firmly adhered and shows no peeling, bubbling, or cracking
- The surface will not be disturbed by planned renovations
- Children do not have regular access to the area
- The location is not subject to repeated friction or impact
Pro Tip: For bathrooms, kitchens, or any wall exposed to moisture, choose wallboard or panelling over encapsulant paint. Moisture weakens coating adhesion over time, and a failed encapsulant is worse than no treatment at all.
How do you confirm paint contains lead before any work begins?
Test first. Do not assume paint is lead-free based on the age of the building alone. Homes built before 1991 may contain lead-based paint or lead base coats beneath newer finishes, and the only way to know is to test.
Health Canada recommends two main testing routes:
- On-site XRF testing by a certified inspector, which gives immediate results without disturbing the surface
- Laboratory analysis of paint-chip samples sent to a lab accredited by the Standards Council of Canada or CALA
When selecting an inspector or lab, confirm the following:
- Accreditation status (Standards Council of Canada or CALA)
- Testing method used and detection limits
- Written report with lead concentration by surface and location
- Chain-of-custody documentation for samples
- Written safety recommendations based on findings
Health Canada's guidance pages are the authoritative starting point for finding accredited testing options in your province.
Step-by-step safe encapsulation methods and approved materials
Follow a containment-first workflow that keeps disturbance to an absolute minimum. The goal is to seal the hazard without releasing any of it.
- Test the surface using an accredited inspector or lab before any preparation work begins.
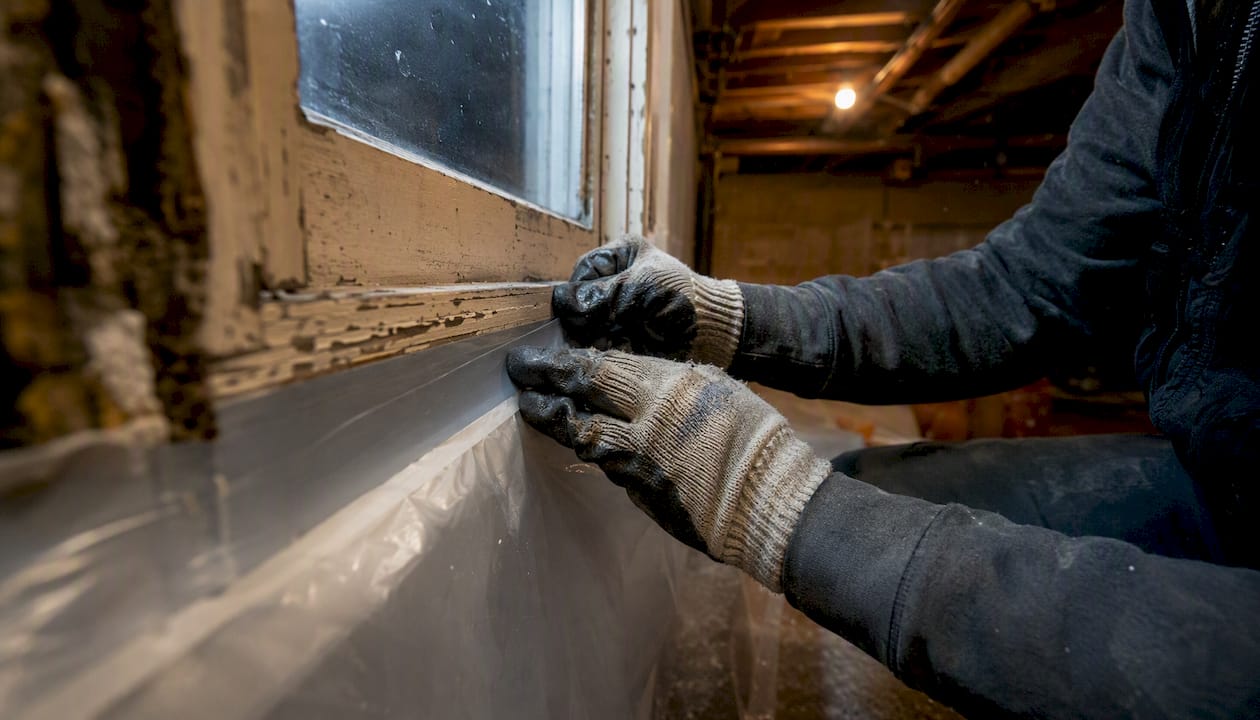
- Set up containment by sealing the work area with plastic sheeting, closing HVAC vents, and posting the area as restricted.
- Put on PPE before entering the work area: N100 respirator, disposable coveralls, nitrile gloves, and eye protection.
- Clean and stabilise the surface using a damp cloth to remove dust and loose debris. Do not sand, scrape, or use a heat gun.
- Apply the encapsulant or install the barrier. For coatings, apply the primer coat first, allow full cure time, then apply the specified number of finish coats. For barriers, fasten wallboard or panelling without disturbing the paint beneath.
- Final cleaning using wet methods and a HEPA vacuum. Bag all waste and dispose of it through your municipality's hazardous-waste programme.
- Verify the result with a visual inspection and, where appropriate, wipe sampling to confirm no dust migration.
Approved materials include encapsulant primers and paints specifically formulated for lead encapsulation, cement backer board or gypsum wallboard for physical barriers, and vinyl wall coverings rated for this application. Always confirm a product's suitability for lead encapsulation with the manufacturer before purchasing.
DO NOT use sanders, heat guns, or open flame on any surface suspected of containing lead. These methods aerosolise lead particles and create a far greater hazard than the original paint.
Pro Tip: After the job is complete, collect a wipe sample from the work area and a control sample from an adjacent untreated room. If lead levels are elevated in the work area, the containment failed and the area needs professional re-cleaning before re-occupancy.
When is encapsulation not the right choice?
Encapsulation is not appropriate when paint is flaking, crumbling, on friction surfaces, or accessible to children. In those situations, full professional abatement is the correct path.
Watch for these red flags before deciding to encapsulate:
- Peeling, chipping, or bubbling paint anywhere on the surface
- Window sills, door frames, stair railings, or other surfaces with visible friction wear
- Any surface scheduled for renovation that will require cutting, drilling, or demolition
- Evidence of existing lead dust, such as chalky residue or staining at floor level
- Areas where children sleep, play, or spend extended time
Renovation work that disturbs old building materials can release lead dust rapidly. When removal is required, a licensed abatement contractor uses sealed containment, HEPA filtration, and negative-pressure equipment to prevent spread; for renovation planning context, see House Renovation - AJC & Son Builders. All contaminated debris must be disposed of through municipal hazardous-waste programmes. Check with your local municipality for specific disposal rules, as requirements vary by province.
See the renovation red flags guide for a broader checklist of situations that require specialist attention before work begins.
How do you hire a licensed abatement contractor in Canada?
For any work that will disturb lead paint, hire a licenced, insured abatement contractor. For encapsulation on surfaces with any risk of failure or disturbance, a contractor with abatement experience is the safer choice over a general painter.
Ask every contractor these questions before signing anything:
- What licences and certifications do you hold for lead abatement?
- Can you provide proof of liability insurance and workers' compensation coverage?
- Do you have references from lead abatement projects in this area?
- Will you provide an itemised written scope and quote?
- What clearance testing do you perform after the work?
- How do you handle hazardous-waste disposal and documentation?
Red flags to walk away from: vague verbal scopes with no written detail, contractors who propose sanding or heat guns, no proof of insurance, and no plan for post-work clearance testing.
CAA-Quebec advises that any removal work disturbing lead paint must be performed by contractors specialised in hazardous-material decontamination. Hmjcontracting provides itemised quotes, certified abatement workflows, and documented post-job clearance for Ottawa-area clients. Their abatement services cover testing coordination, containment, removal, and disposal. For renovation planning context, the hidden renovation hazards guide explains how lead, asbestos, and mould often appear together in older homes.
What do encapsulation and removal typically cost and how long do they take?
Encapsulation is generally faster and less expensive than full removal, but the actual cost depends on several site-specific factors. Get an itemised estimate before committing to either approach.
Key cost drivers include:
- Total square metres of surface to treat
- Whether containment or negative-pressure systems are required
- Condition of the paint (stable vs. partially peeling)
- Post-work clearance testing fees
- Municipal hazardous-waste disposal fees (these vary by location)
- Local labour rates and site access
A small room encapsulation typically takes one to two days. Multi-unit removal and full abatement can run from several days to several weeks depending on scope. These are general ranges; a contractor estimate based on your specific property is the only reliable figure.
| Regulatory reference | Value | Source |
|---|---|---|
| Maximum lead in dried surface coatings | 90 mg/kg | Surface Coating Materials Regulations |
| Municipal disposal fees | Varies by municipality | Contact your local hazardous-waste programme |
For guidance on keeping project costs predictable, the renovation cost overruns guide covers budgeting and scope controls relevant to abatement projects.
How do you maintain encapsulated surfaces over time?
Regular inspection is not optional. Encapsulation can fail if surfaces are damaged, punctured, or disturbed, and a failed encapsulant releases the very hazard it was meant to contain.
Maintain a consistent aftercare routine:
- Conduct visual checks every 6–12 months, looking for cracks, peeling, or impact damage
- Repair any punctures or peeling immediately using compatible encapsulant material
- Clean high-contact areas with damp cloths rather than abrasive scrubbing
- Keep a property file with all test reports, contractor scopes, invoices, and disposal manifests
Retest or re-encapsulate after any renovation that affects adjacent surfaces, after visible signs of wear, or when children move into the property. Future owners and regulators may request this documentation, so organised recordkeeping protects you at resale.
An expert perspective on encapsulation decisions
When a client asks whether to encapsulate or remove, the answer depends on what the paint is doing right now. If it is intact, not generating dust, and out of reach of children, encapsulation is a sound, lower-risk option backed by Health Canada guidance. If there is any peeling, friction wear, or a renovation planned nearby, removal is the only responsible recommendation.
At Hmjcontracting, we have worked on Ottawa properties ranging from century-old row houses to mid-century apartment buildings. The pattern is consistent: the properties where lead exposure became a real problem were the ones where someone disturbed paint without testing first or tried to paint over a surface that was already failing. Our licenced abatement workflows, itemised quotes, and post-job clearance documentation exist precisely to prevent that outcome for our clients.
Hmjcontracting: licenced abatement and testing coordination for Ottawa homeowners
Hmjcontracting offers licenced abatement, testing coordination, and itemised quotes to manage lead risks safely for Ottawa-area homeowners and property managers.

The team carries full liability insurance, operates with certified abatement workflows, and holds a 5.0 Google rating across hundreds of completed projects. Every job includes clear documentation: written scope, post-work clearance results, and disposal manifests you can keep in your property file. Whether you need testing coordinated, a surface encapsulated, or full lead removal before a renovation, Hmjcontracting handles the process from first inspection to final sign-off. Request a free, itemised estimate through the abatement services page.
Sources
Use these primary sources to verify guidance and find accredited services:
For any work that disturbs paint, prioritise accredited labs for testing and licenced abatement contractors for the work itself. That combination is what keeps your property compliant and your occupants protected.